Single tenant daemon using Managed Identity
A single-tenant daemon service (which accesses resources within the tenant) is commonly showcased using the Azure AD Application model. However, since the daemon scenario uses a confidential client flow, you now need to deal with the application secrets. Where do you store it securely (eg: Azure KeyVault) and how do you rotate it regularly? This blog shows how you can use Managed Identities for your daemon service and get away from having to deal with credentials.
Introduction
An earlier blog post discussed how to build a multi-tenant daemon app that can access Azure and Graph resources in different tenants. Since multi-tenant access is a capability in the AAD Application model, we needed an Azure AD application to achieve that. Here, we will look at how you can build a single tenant daemon service using managed identity and call APIs you have published and protected using Azure AD.
What is Azure AD Managed identity?
If you are reading this blog, you are probably already familiar with managed identities. In a nutshell: Azure AD Managed identity is an identity where the credentials/secrets are managed by the Azure platform. Your service running on Azure can simply use that identity to get tokens to access Azure AD protected resources. No more worrying about storing secrets, rotating them or accidentally checking them in your code repository.
Step 1, Deploy your service in Azure with a managed identity
Create an Azure resource, such as a Web App or Functions, where you will run the code for your daemon service. In the Azure portal, this resource has an Identity section where you can create and assign a managed identity to your service.
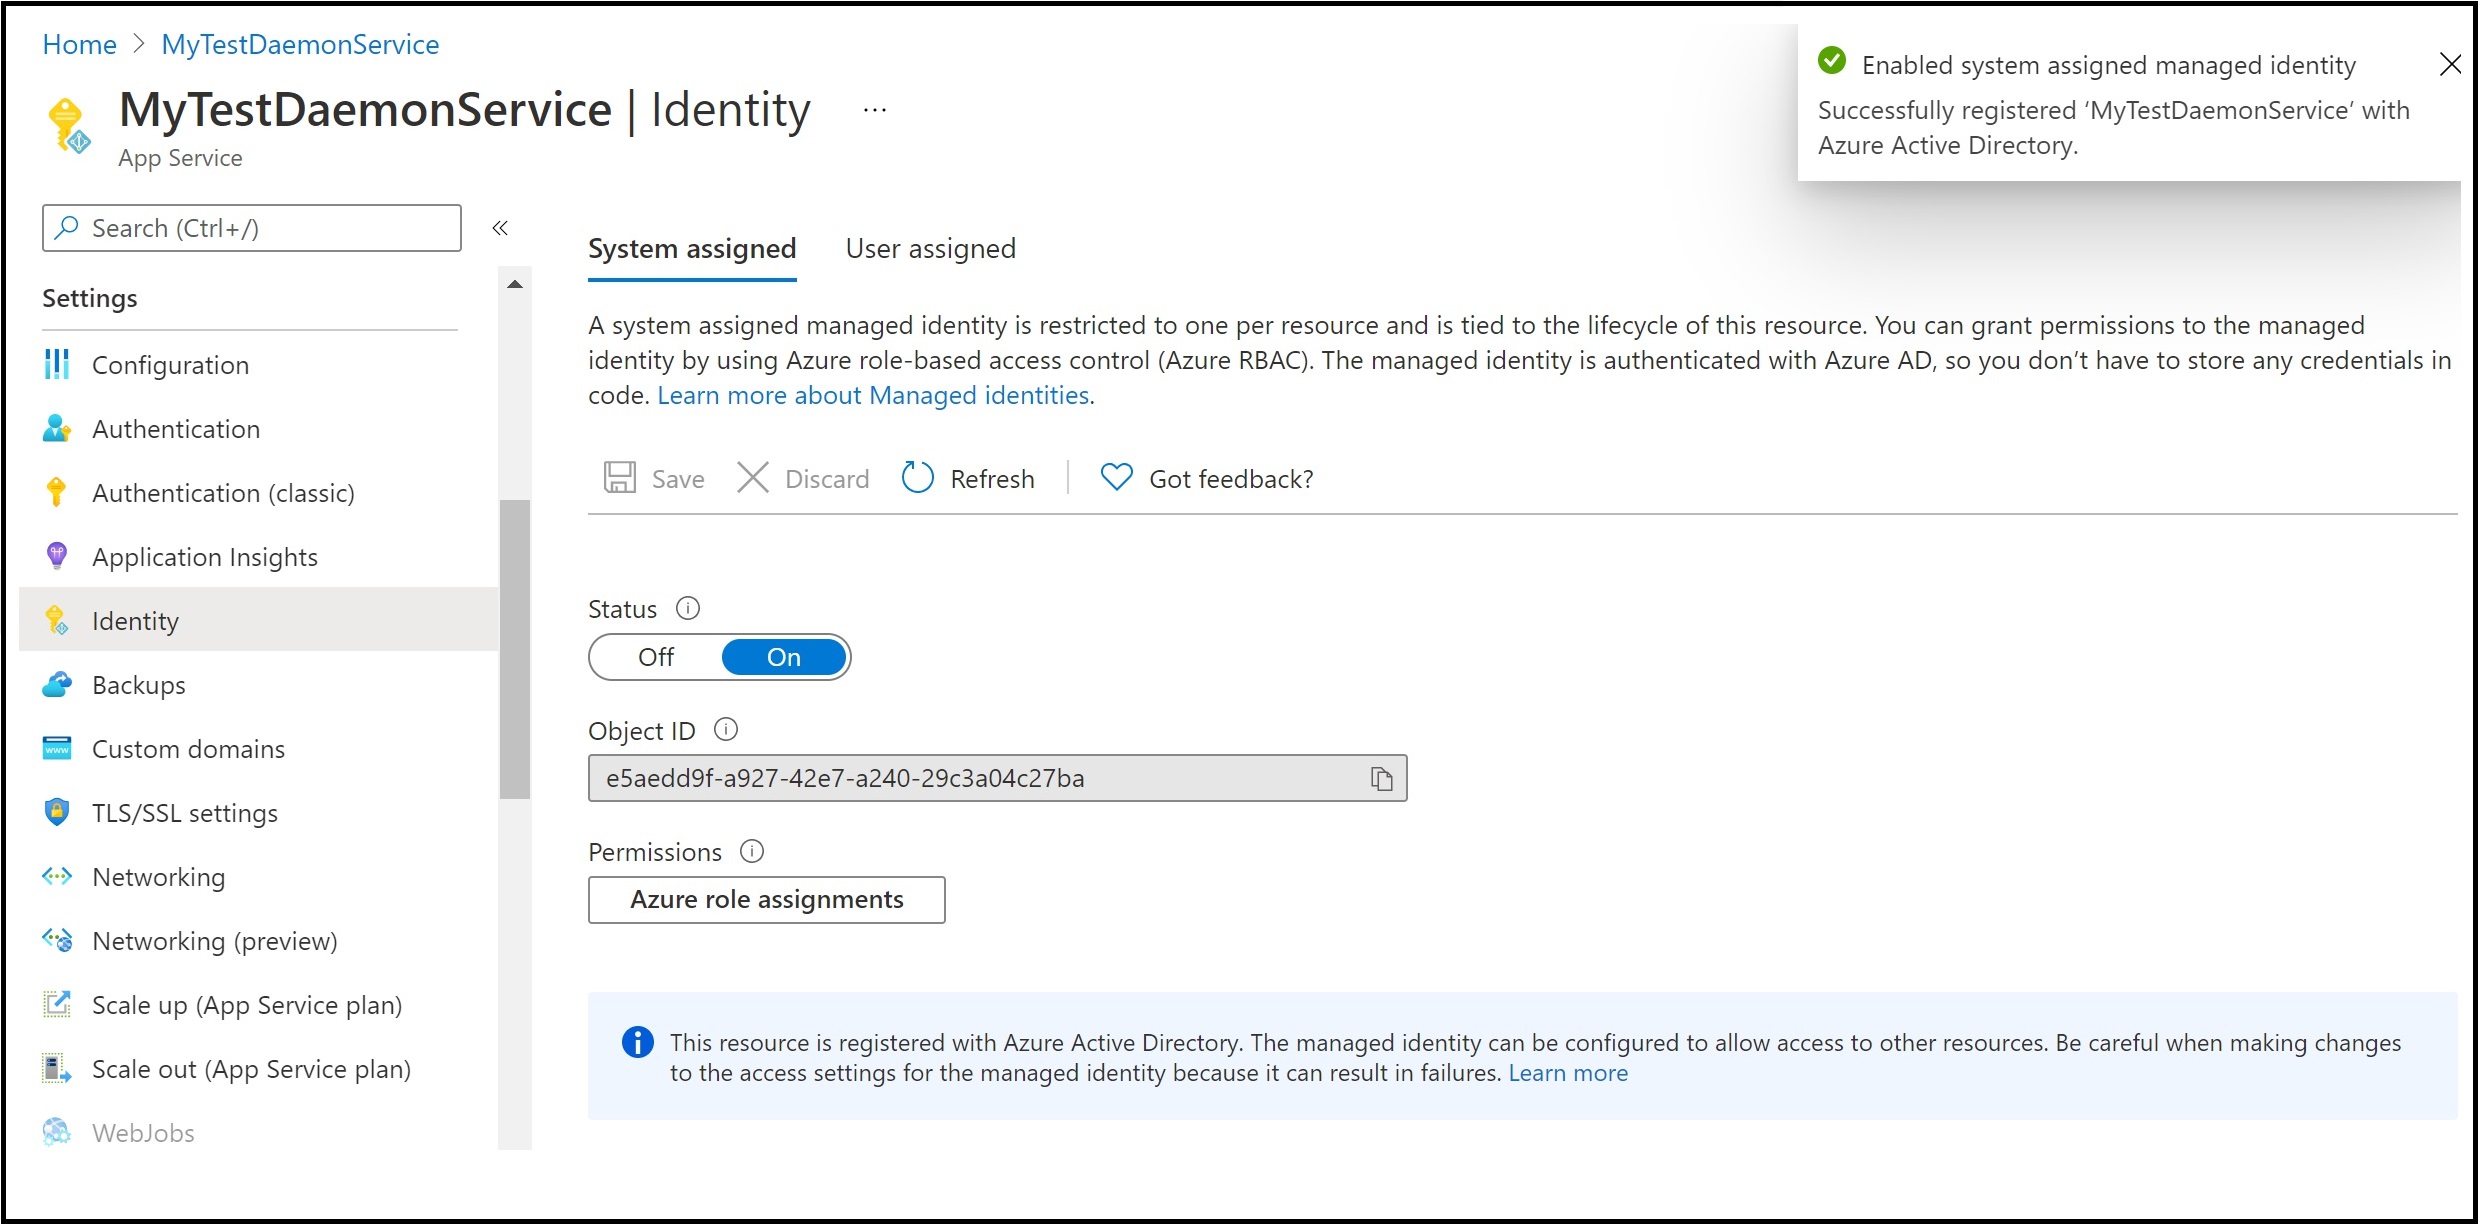
Make a note of the object id of your managed identity, you will need it in the next step.
Step 2, grant this identity any application role needed to access your APIS
Since you want this daemon service to access your APIs which are protected by Azure AD, you now need to assign the managed identity the application roles needed to access those APIs.
You can do this via PowerShell by following directions in this Microsoft document
This PowerShell needs multiple ids, some of them redundant and others with confusing names. While you may wonder why someone designed it this way, let’s put that behind us and focus on getting this task out of our way.
You will need the following:
- the object id of the managed identity
- the object id of the service principal representing your application
- The id of the app role
We already saw where we can get the object id of the managed identity, in Step 1. You can get this from the identity section of the web app where you assigned the managed identity.
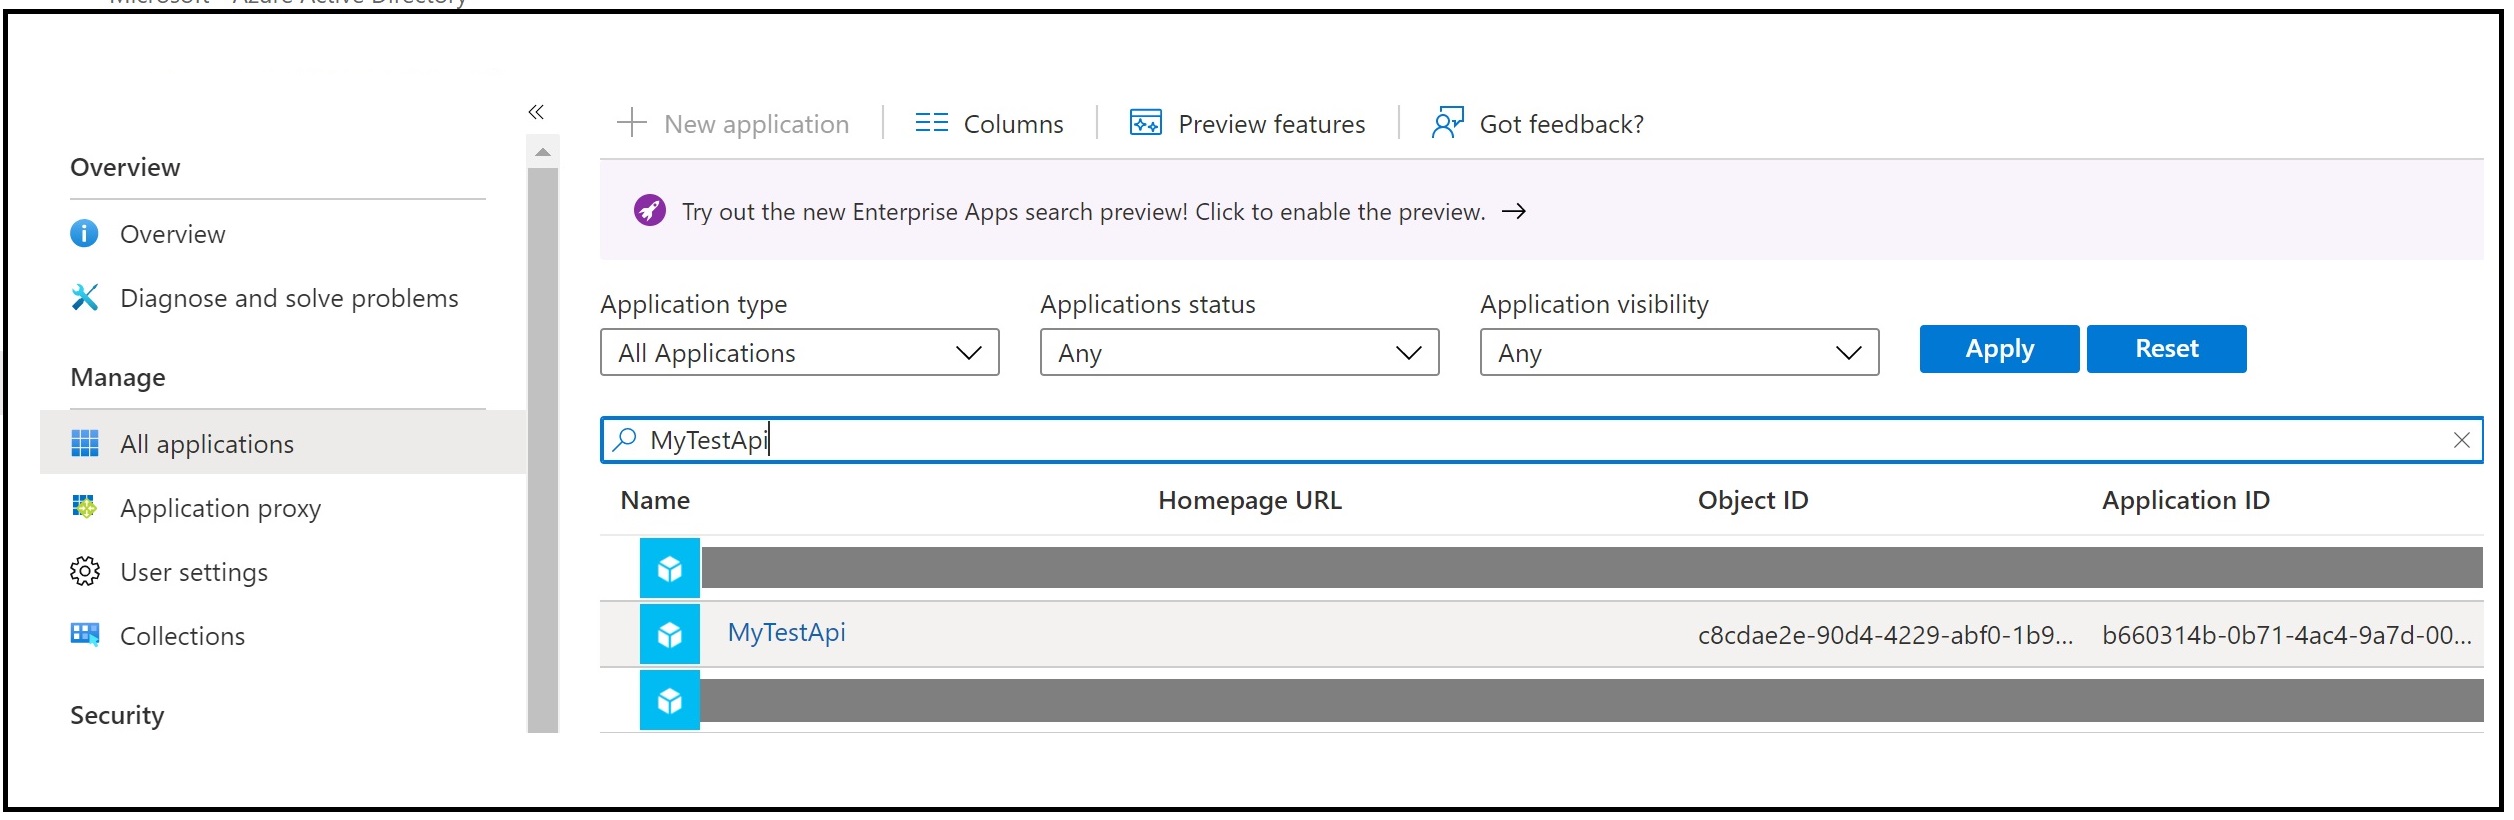
The object id of the service principal is available in the “Enterprise Applications” section in the Azure Active Directory portal. (Pick all applications and search for your API application)
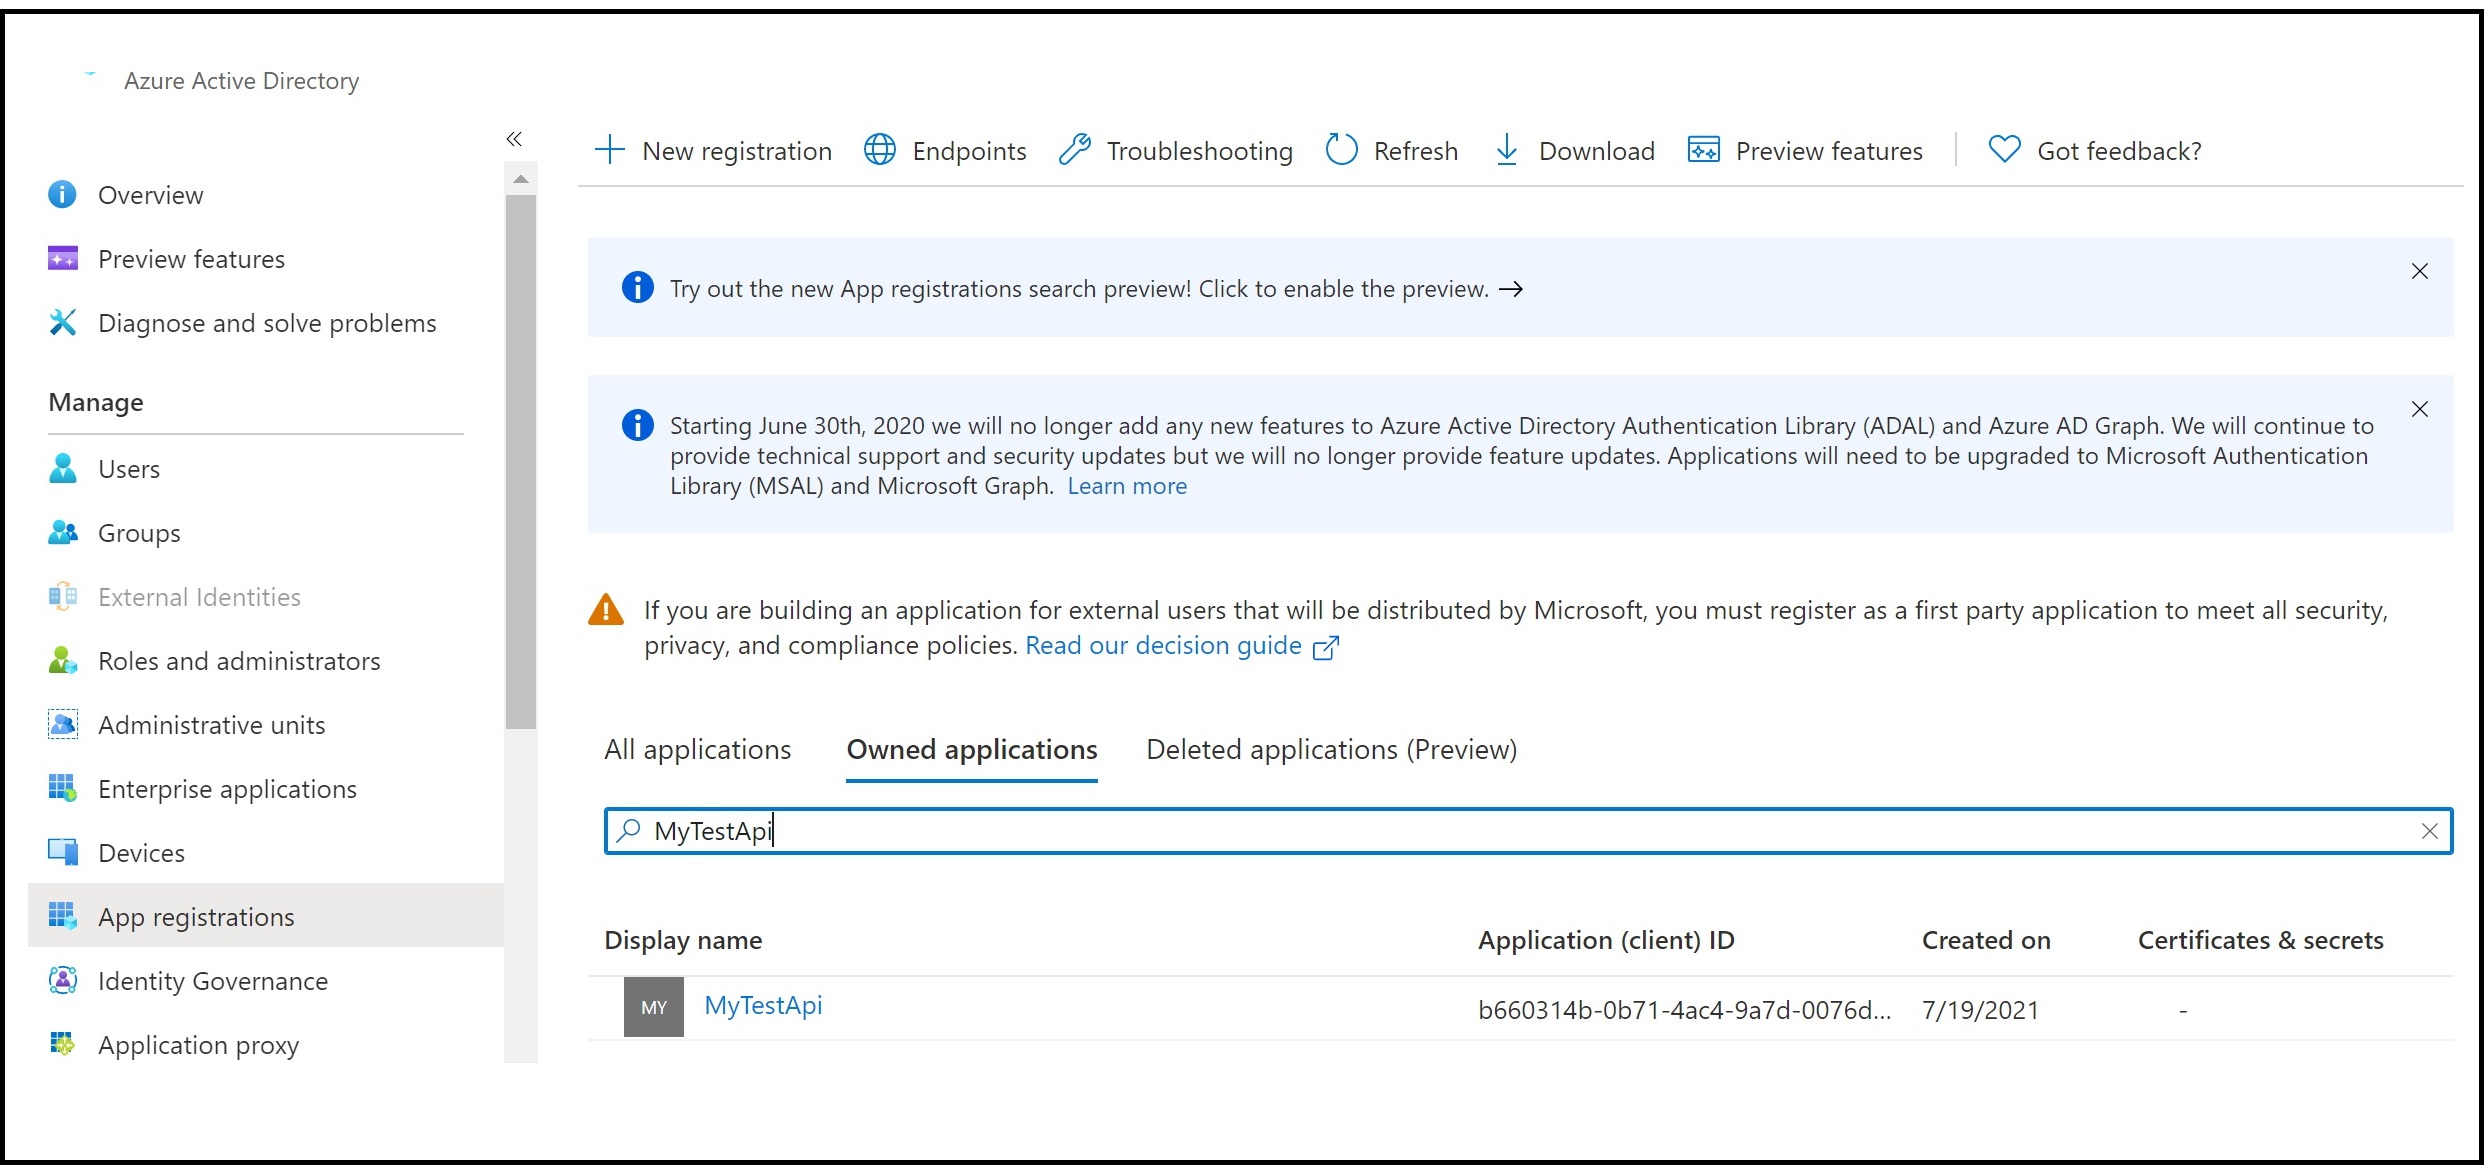
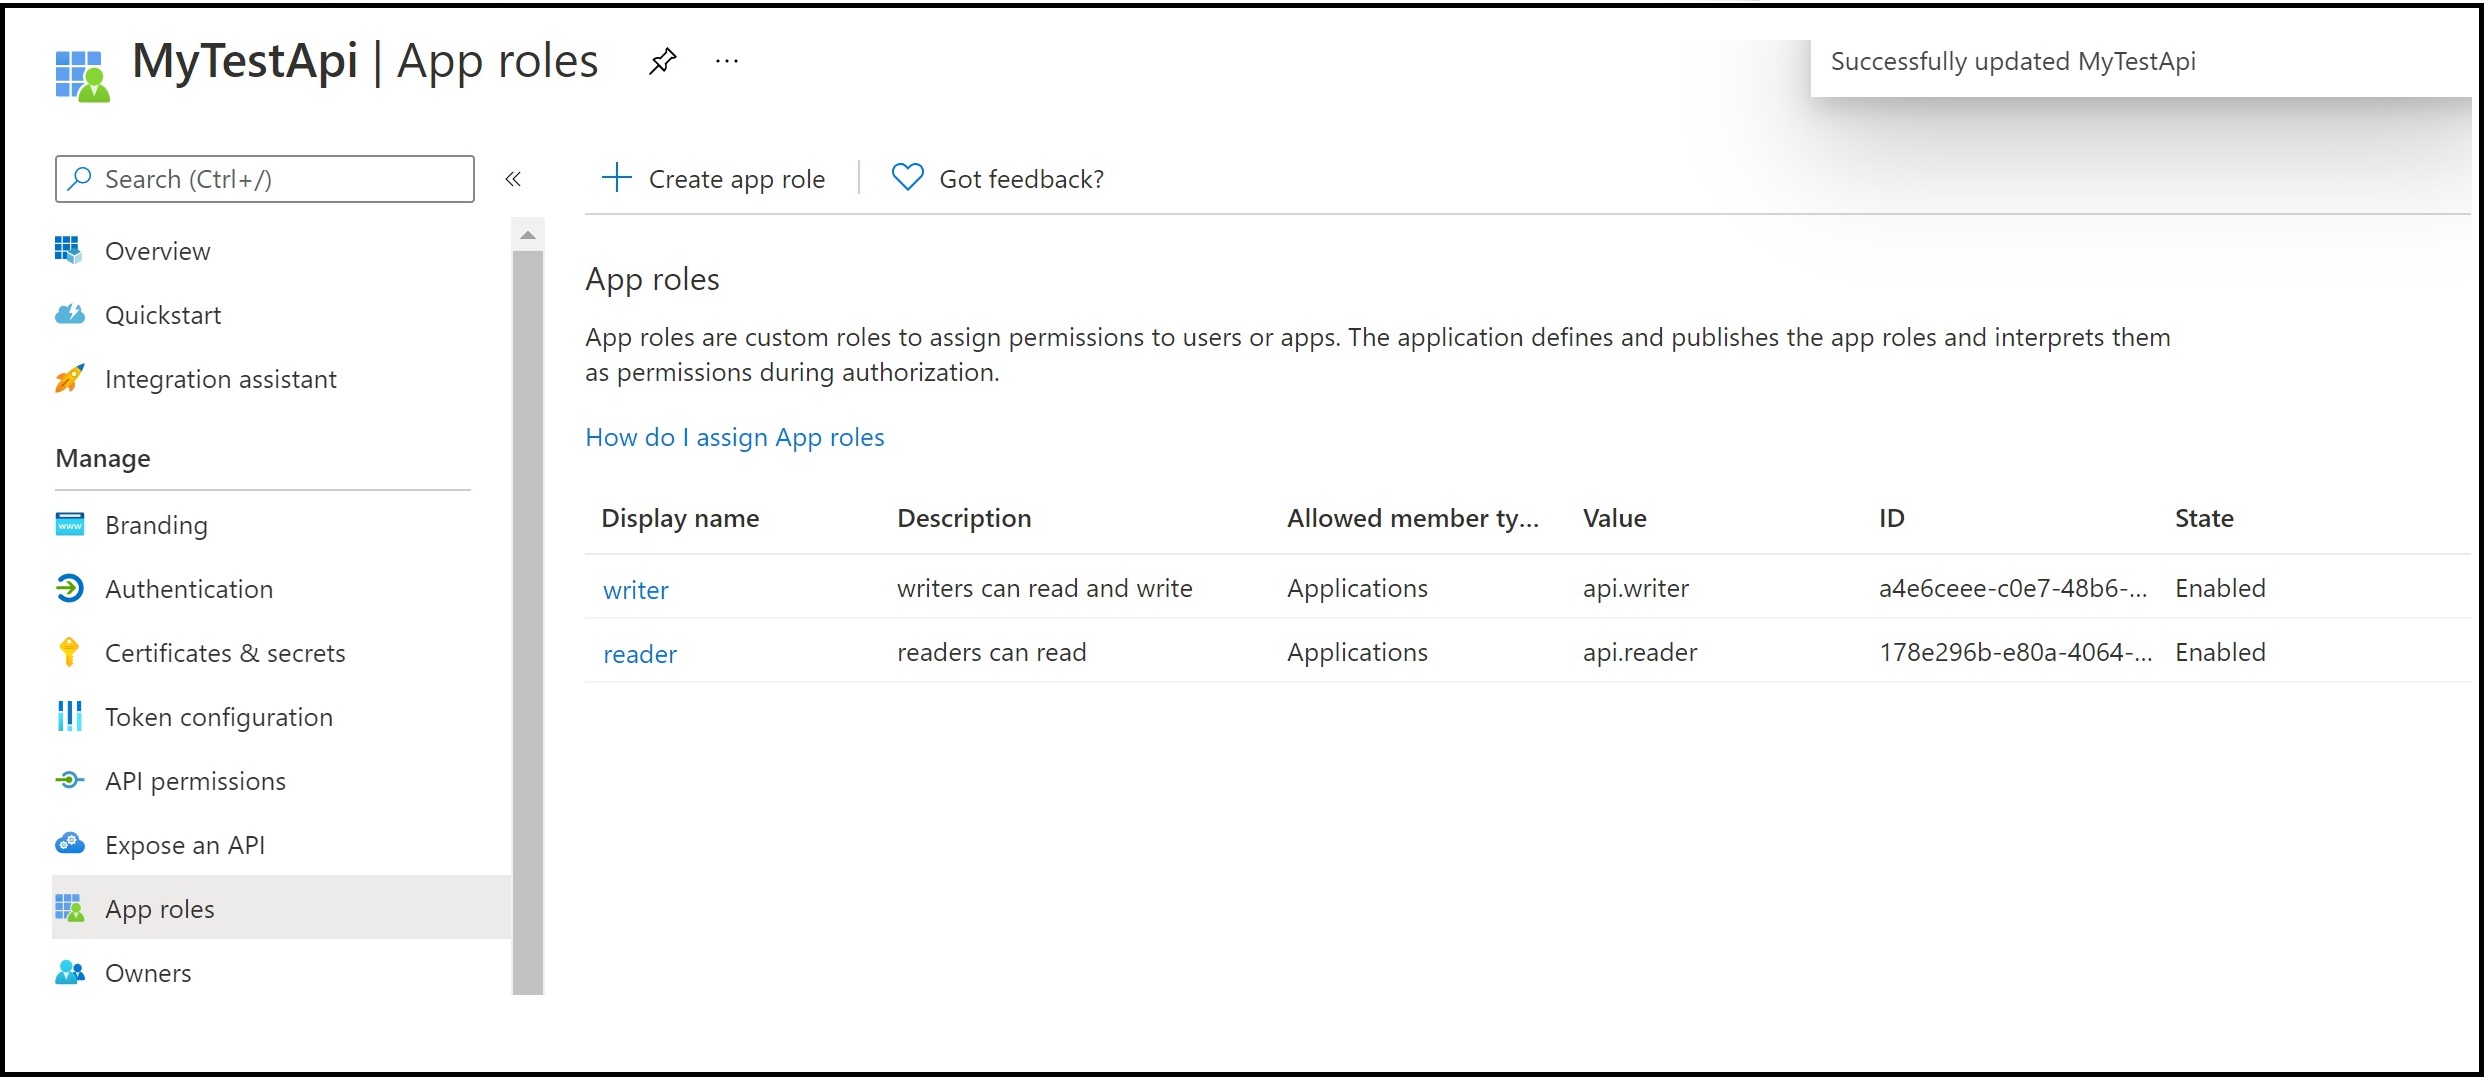
The id of the app role can be found by going to “App Registrations” section in Azure Active Directory and picking your API application.
First, find your application in the App Registrations
Then go the app roles of your API to find the app roles that need to be assigned
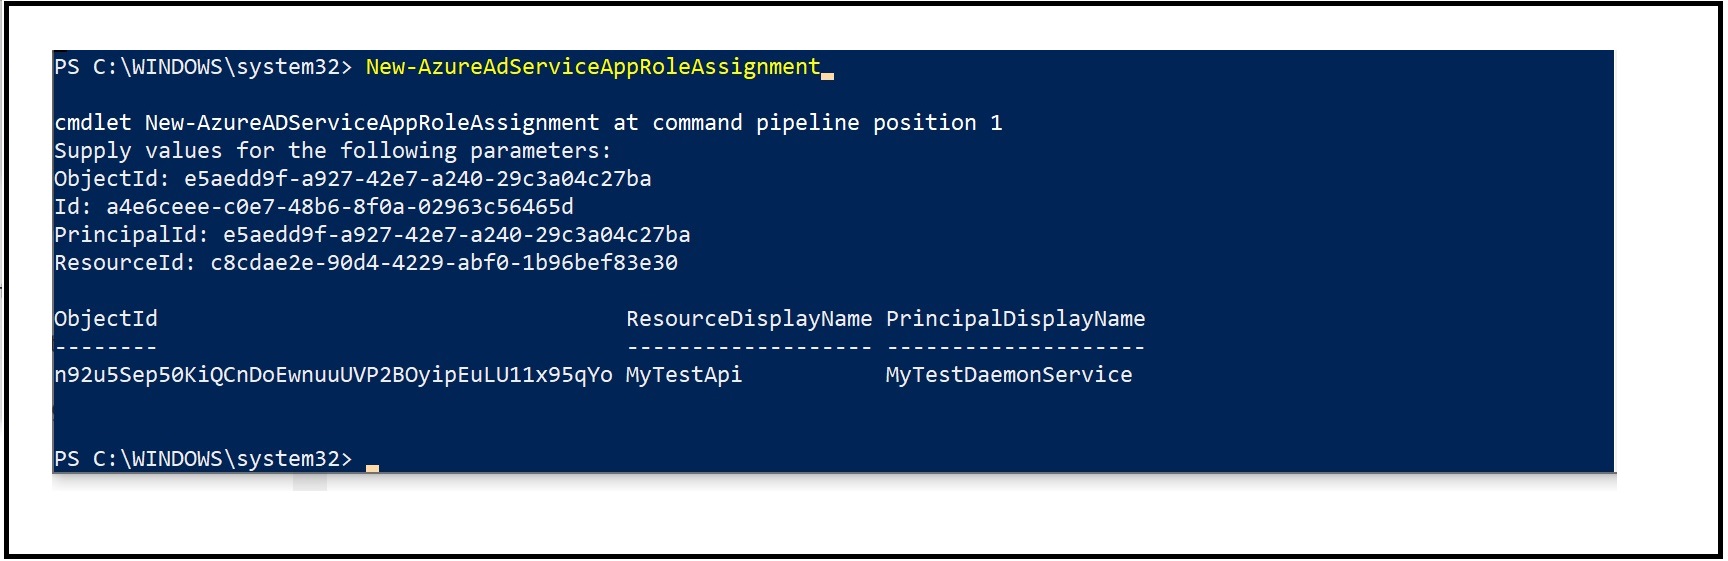
You now have all the things needed to assign your managed identity to the app role for your APIs using New-AzureADServiceAppRoleAssignment. Use the link earlier in the doc for instructions on how to use all these ids to call the PowerShell.
To undo the assignment, simply use the Remove variant of the PowerShell: Remove-AzureADServiceAppRoleAssignment
Step 3, use Azure Identity SDK to get tokens for your Managed identity
Now when you get a token for the managed identity, it contains the app roles you assigned to it. You can get tokens in a variety of ways using the Azure Identity SDK. A simple example is to use the ManagedIdentityCredential using the client id of the managed identity for your service. When you send this token to your API call, your API application can check for the app roles to determine what permissions are allowed for your daemon service.
To see a very rudimentary example of the daemon app that illustrates the code in Node.js, see this GitHub repo.
Comments/feedback/questions? DM me on twitter