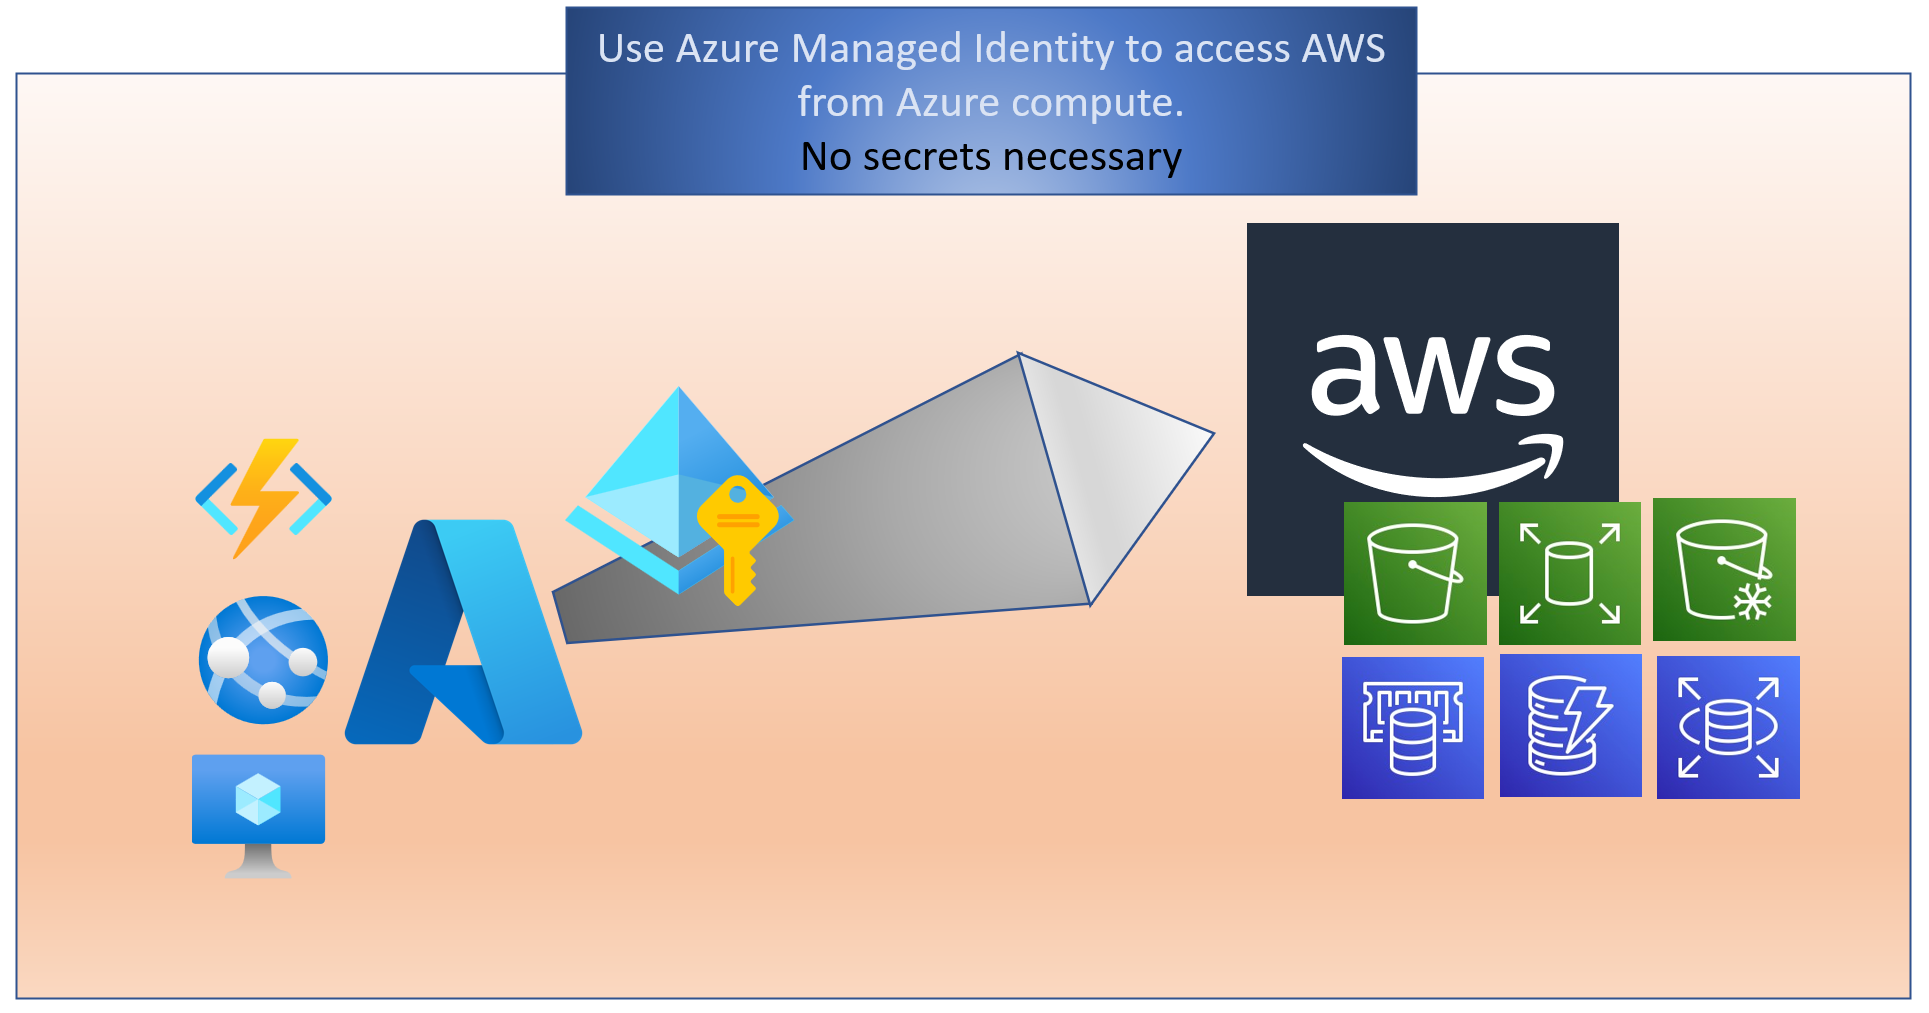
Access AWS resources using Azure AD Managed Identity
When developers build services that need to access other resources, they have to figure out how to manage the credentials for this access. When these services are running in Azure, developers can use managed identities in Azure to avoid dealing with credentials on their own. This “secret-less” model can be used even when these services need to access Amazon Web Services (AWS) resources. This lets you avoid having to store and manage AWS credentials in Azure. This blog post provides a walkthrough of how you can achieve this.
First, the concepts we will use to set this up
Before we jump into the specifics, let’s refresh ourselves on a few concepts, to ensure that we can set this up securely and avoid any surprises later on.
Azure AD Managed Identity
The Azure AD managed identity is an Azure resource. It gives you an identity whose credentials are managed by the Azure platform. When you run code in any Azure compute resources, such as App Services and Functions, you can use a managed identity to access resources granted that identity. Using managed identities, you can avoid having to store, secure, rotate or manage the credentials on your own.
Azure AD Tokens
Azure AD supports the open standard OAuth protocol to issue access tokens. It also supports refresh tokens in many scenarios. When using managed identities to get tokens, we will be using the OAuth Confidential Client flow which only has access tokens. The expectation in this OAuth flow is that the client can detect when the token is expiring and get new access tokens as needed.
The OAuth token has a few components we need to familiarize with:
Subject claim
The “sub” claim in the OAuth access token represents the identity to whom this token was issued.
Audience claim
The “aud” claim in the OAuth token represents the identity of the intended recipient of the token. When accepting tokens, it is important to only accept tokens intended for your audience to avoid security issues.
Expiry claim
The “exp” claim in the OAuth token represents how long the token is valid. The recipient of the token should check this claim to ensure the token is not stale. This is also the information your client can use to determine when you need to “refresh” your access tokens.
Role claims
OAuth also allows the token to contain other custom claims. Azure AD access tokens include a “roles” claim. It includes all the app roles assigned to the “subject” to whom the token was issued. See recieve app roles in tokens.
AWS AssumeRoleWithWebIdentity
The AssumeRoleWithWebIdentity allows you to configure tokens issued by any identity provider to assume a role in AWS. You can then access AWS resources granted to that role. We will use this capability to access AWS resources using managed identities in Azure. Here is another helpful reference on this concept.
Trust Relationship
AWS has a policy document where you can configure the specific authorization rules. Using this, you can ensure only the identities you pick are allowed to assume the role. We will combine our knowledge of Azure AD OAuth token and the AWS trust policy behavior to set things up securely.
There are specific keys you can use in this trust relationship. See the available keys for AWS web identity federation for more details.
Putting this all together
Now that we have refreshed ourselves on these concepts, let’s look at how we make this secure. Our goal is to ensure that only our chosen identities can access our AWS resources.
First, we need to determine whether we want to achieve this with a single managed identity or we need multiple managed identities to assume the AWS role.
Next, we need an audience in your Azure AD tenant that represents your AWS account, even though AWS is not really in your tenant. This ensures that you don’t use tokens with other audiences which have the potential for security issues. In Azure AD, we can use either the client_id of an Azure AD service principal as the audience or the Application URI of an Azure AD application as the audience.
If we want to achieve this with a single managed identity, we can take a simple approach and create that single managed identity dedicated to your AWS scenarios. We can then use the client_id of that managed identity as the audience when requesting tokens. In other words, the managed identity is getting a token for itself. We can then use the audience and subject claims in the token to limit that single managed identity to assume your AWS role.
If you need more than one identity in your tenant to assume the same AWS role, you can achieve this using an Azure AD Application dedicated for this purpose. You create an app role and assign multiple identities to this role. Ideally, you would be able to use the audience claim along with the role claim when authorizing these identities to assume the AWS role. However, the AWS conditions only seem to support aud and sub. The Azure AD application model gives us a way to work around this restriction. We will look at this option later in the blog.
Option 1: Using one managed identity
First, let’s take the simple approach and set this up using a single identity.
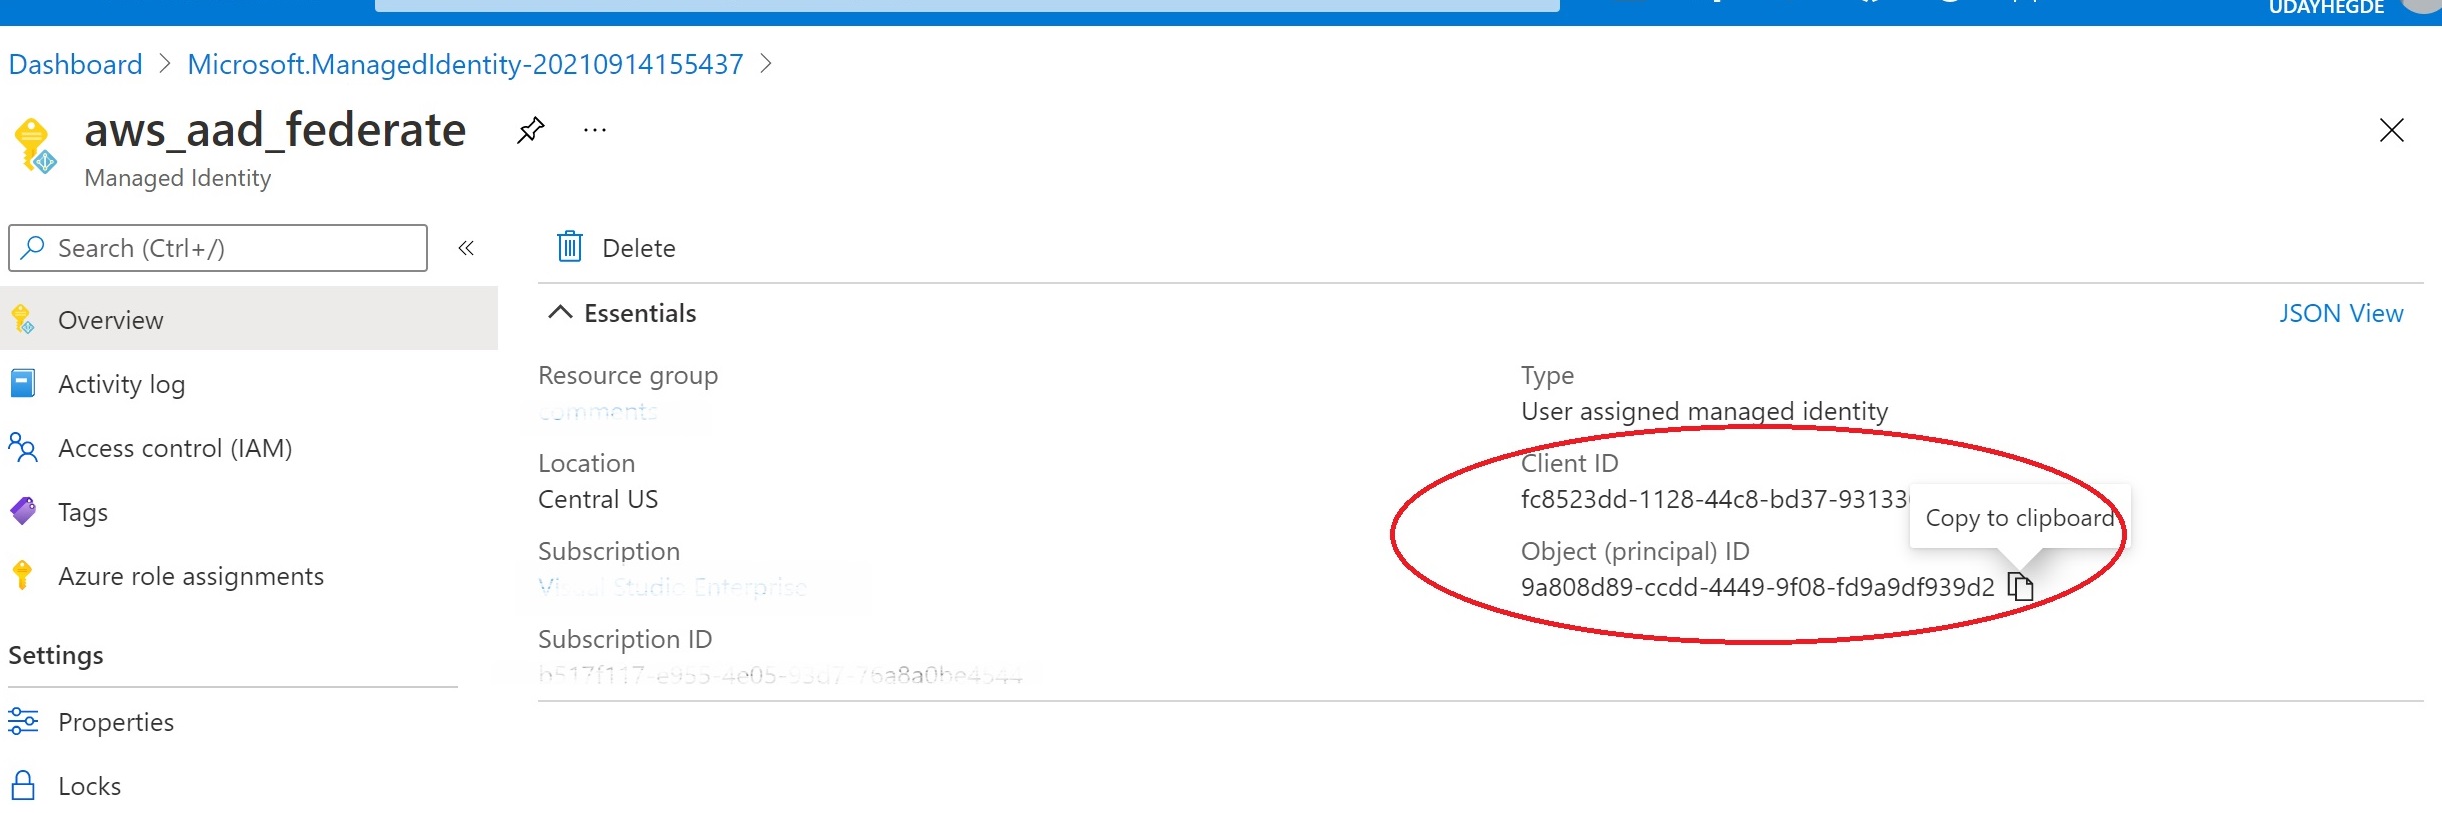
Go to the Azure portal and create a “User assigned managed identity”. Copy its client id and object id. You will need these later.
Setting up AWS federation with your Azure AD Tenant
Create an identity provider in AWS
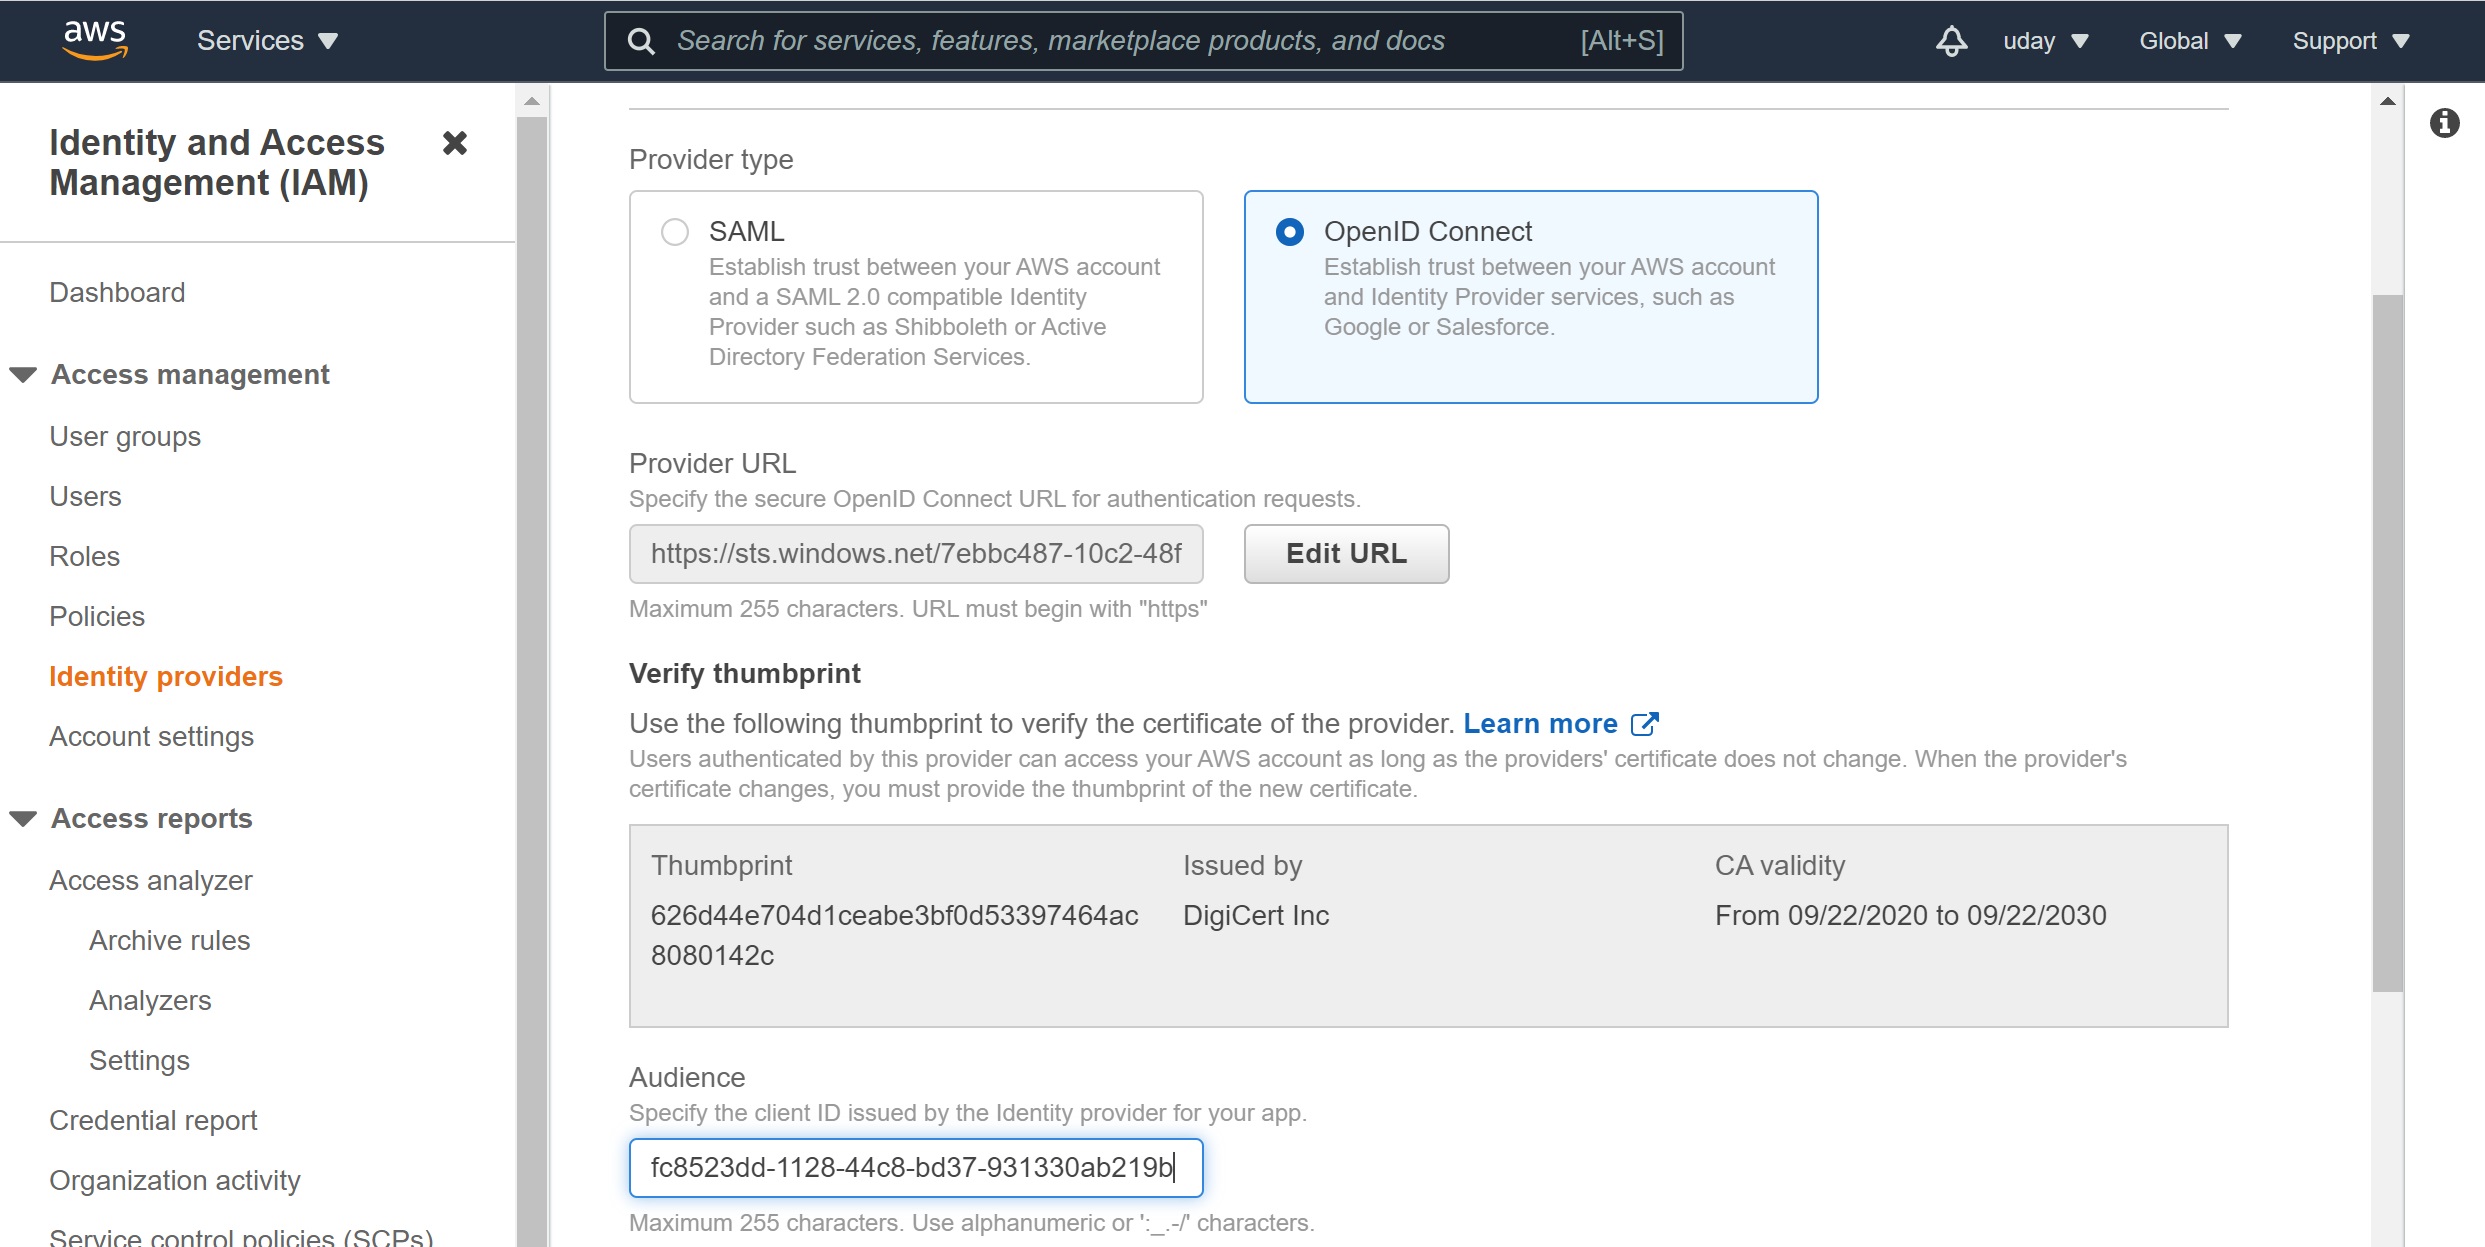
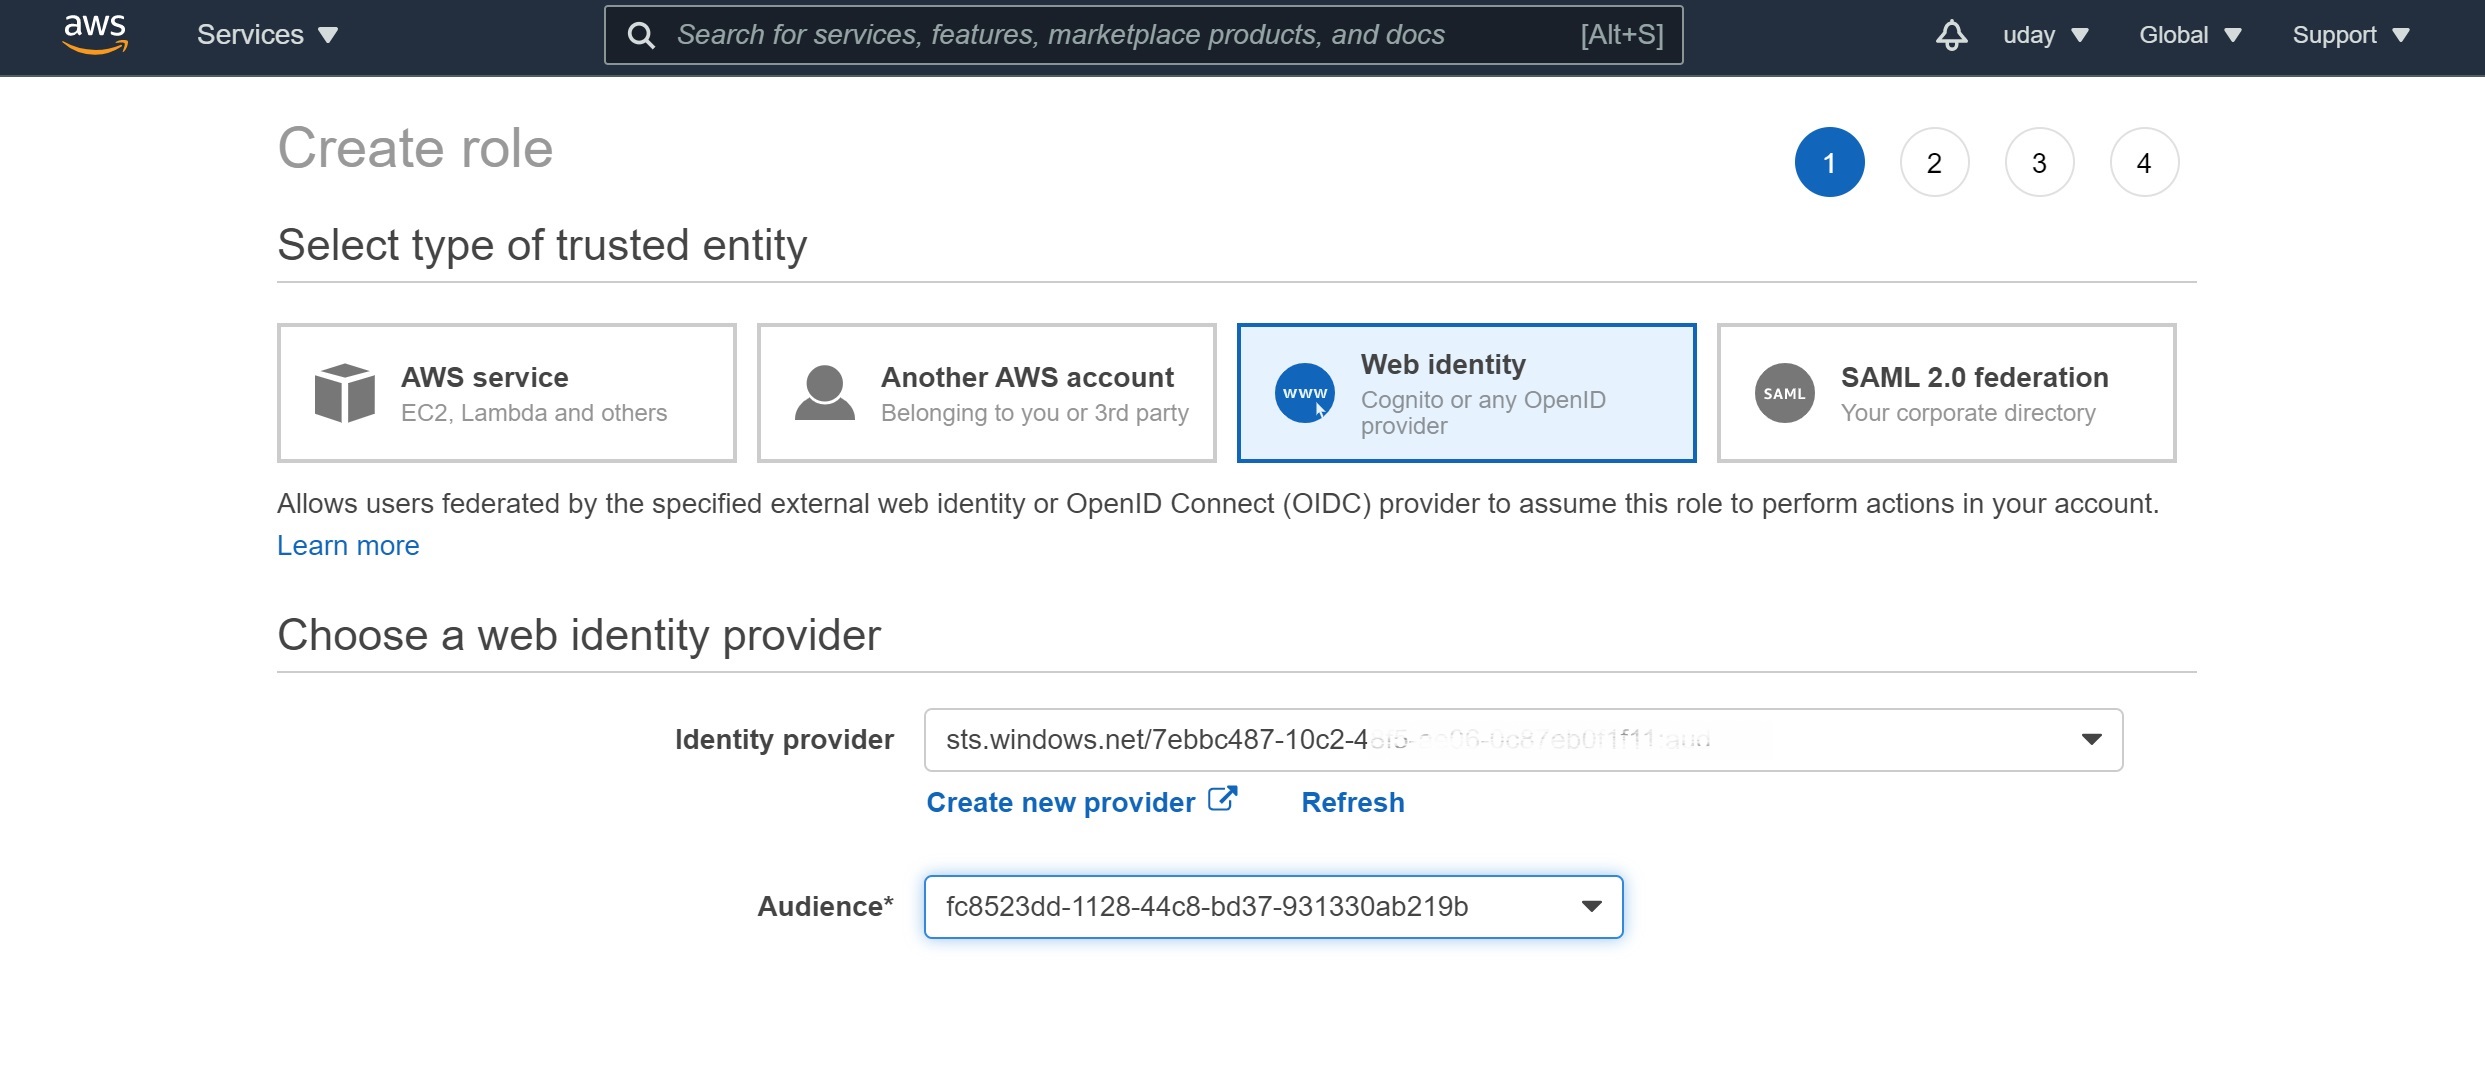
Head over to the AWS console, and select the IAM service. Click on “Identity providers”, and “Add provider”. Choose the “OpenID Connect” option. In the provider URL, enter https://sts.windows.net/[your-tenant-id]. If you don’t have your tenant id handy, see how to find your tenant id.
Click on “Get Thumbprint”. I am not sure why AWS is acquiring this statically. I was expecting AWS to follow the chain of trust dynamically as needed.
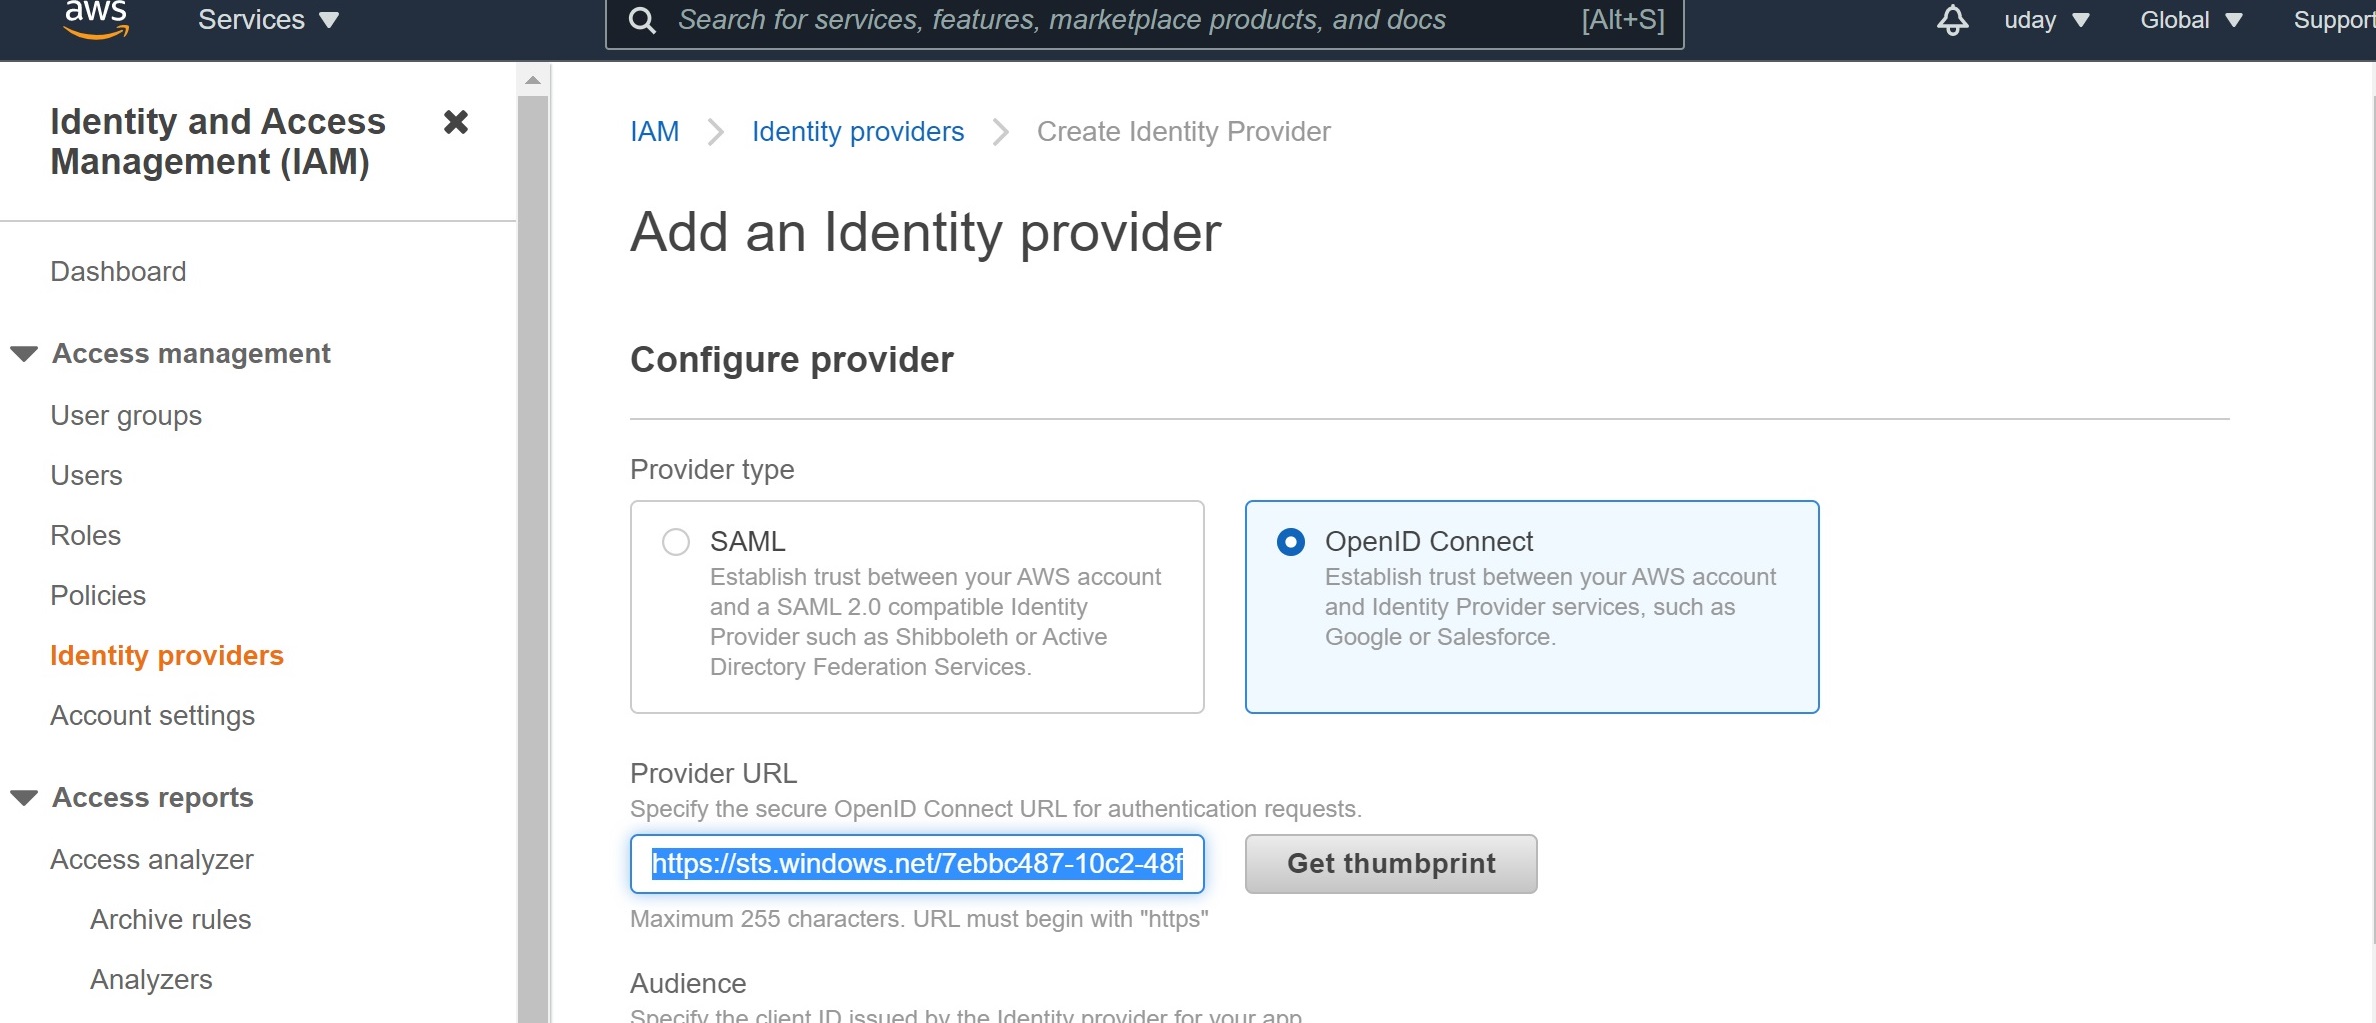
Use the client id of your managed identity as the audience and click on “Add Provider”.
Assign a role to that identity provider
Next, you need to create an AWS role and assign it to this provider. This will allow you to use the Azure AD tokens to assume this AWS role. Click on the identity provider you just created, click on “Assign role”, and “Create a new role”.
In “Select type of trusted identity”, you should see AWS has already picked “Web identity” and populated your identity provider. Select the audience you just configured on the provider. (Note: You can also configure this identity provider with additional audiences if needed)
Click on permissions and configure the finer-grained permissions you want to grant to this role. You can pick among existing policies or create a custom policy. In the review step, you provide a name for this role and a description, and click “Create Role”.
Now, pick the role you just created, click “trust relations”, and “Edit trust relationship”.
{
  "Version": "2012-10-17",
  "Statement": [
    {
      "Effect": "Allow",
      "Principal": {
        "Federated": "arn:aws:iam::<your-aws-account-id>:oidc-provider/sts.windows.net/<your-tenant-id>"
      },
      "Action": "sts:AssumeRoleWithWebIdentity",
      "Condition": {
        "StringEquals": {
          "sts.windows.net/<your-tenant-id>:aud": "<client id of managed identity>"
        }
      }
    }
  ]
}
Anyone who can get a token for this audience in your tenant can access the AWS resources granted to this role. So you should restrict this further to the specific identity by using the subject condition.
{
  "Version": "2012-10-17",
  "Statement": [
    {
      "Effect": "Allow",
      "Principal": {
        "Federated": "arn:aws:iam::<your-aws-account-id>:oidc-provider/sts.windows.net/<your-tenant-id>"
      },
      "Action": "sts:AssumeRoleWithWebIdentity",
      "Condition": {
        "StringEquals": {
          "sts.windows.net/<your-tenant-id>:aud": "<client id of managed identity>",
          "sts.windows.net/<your-tenant-id>:sub": "<object id of managed identity>"
        }
      }
    }
  ]
}
Finally, access the AWS resources from your service!
You have now completed all the configurations needed to try this out end to end. Let’s look at a code sample to get Azure AD tokens and provide that to AWS.
Assign the managed identity to your Azure App Service (or Functions) where your code is running. Then use the Azure Identity SDK to get a token for that managed identity with the audience being the client id of your managed identity. Here’s a code snippet using Node.js
    const identity = require("@azure/identity");
    const clientId = "<client id of managed identity>"
    const audience=clientId;

    const credential = new identity.DefaultAzureCredential(
                    { ManagedIdentityClientId : clientId });
    const token = credential.getToken(audience);
As discussed earlier in this blog, this is the OAuth Confidential Client flow. You get access tokens, but no refresh tokens. You need to refresh this token regularly before it expires. The instructions for how to do this vary depending on the AWS SDK you use. For example, when using the aws-sdk for Node.js, here’s a snippet I used
public tokenRefresh = async() =>{
    return credential.getToken(audience)
    .then ((response:any) => {
        if (response) {
            //update the token in the AWS credentials class
            AWS.config.credentials.params.WebIdentityToken = response.token
            //set a timer to refresh the token when it expires. We may need the timer to trigger
            //a bit earlier, and not wait till the token is expired
            setTimeout(tokenRefresh,
                       response.expiresOnTimestamp - Date.Now());
        }
        else {...}
    }
    .catch(...){...}
}
Option 2: using an Azure AD Application.
Let’s see how you can use the Azure AD application for some additional flexibility. This is especially useful if you want to allow multiple managed identities to assume the AWS role.
The ideal way to achieve this would have been to assign the managed identities to an app role, and then use the role claim in AWS to authorize assuming the AWS role. However, AWS does not support the use of custom claims in the token. So we have to find other creative ways to solve this problem. We will use the following on the Azure AD side to enforce who can get the token with the application audience:
- Configure your Azure AD application to require user assignment. This will ensure that only identities assigned to the application can get a token with the application audience
- Create an application role and assign your selected managed identities to that role.
- make sure no one adds any other roles or assign other identities to the application
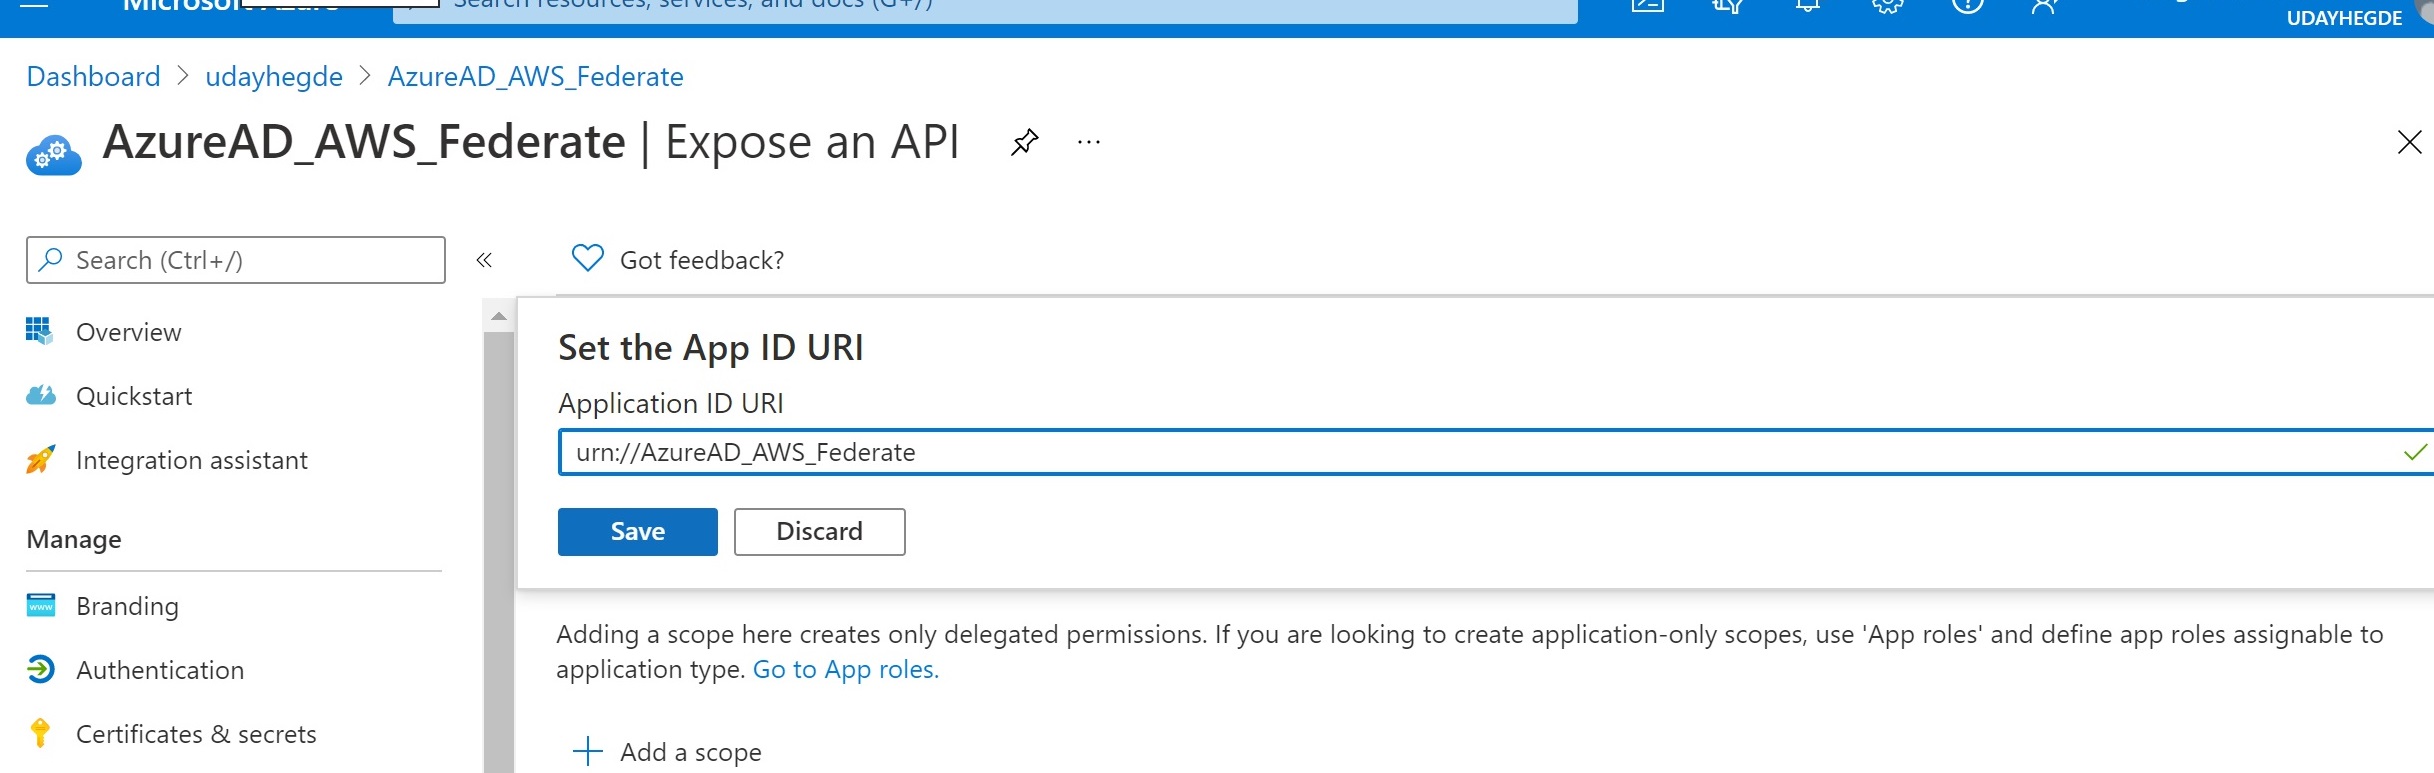
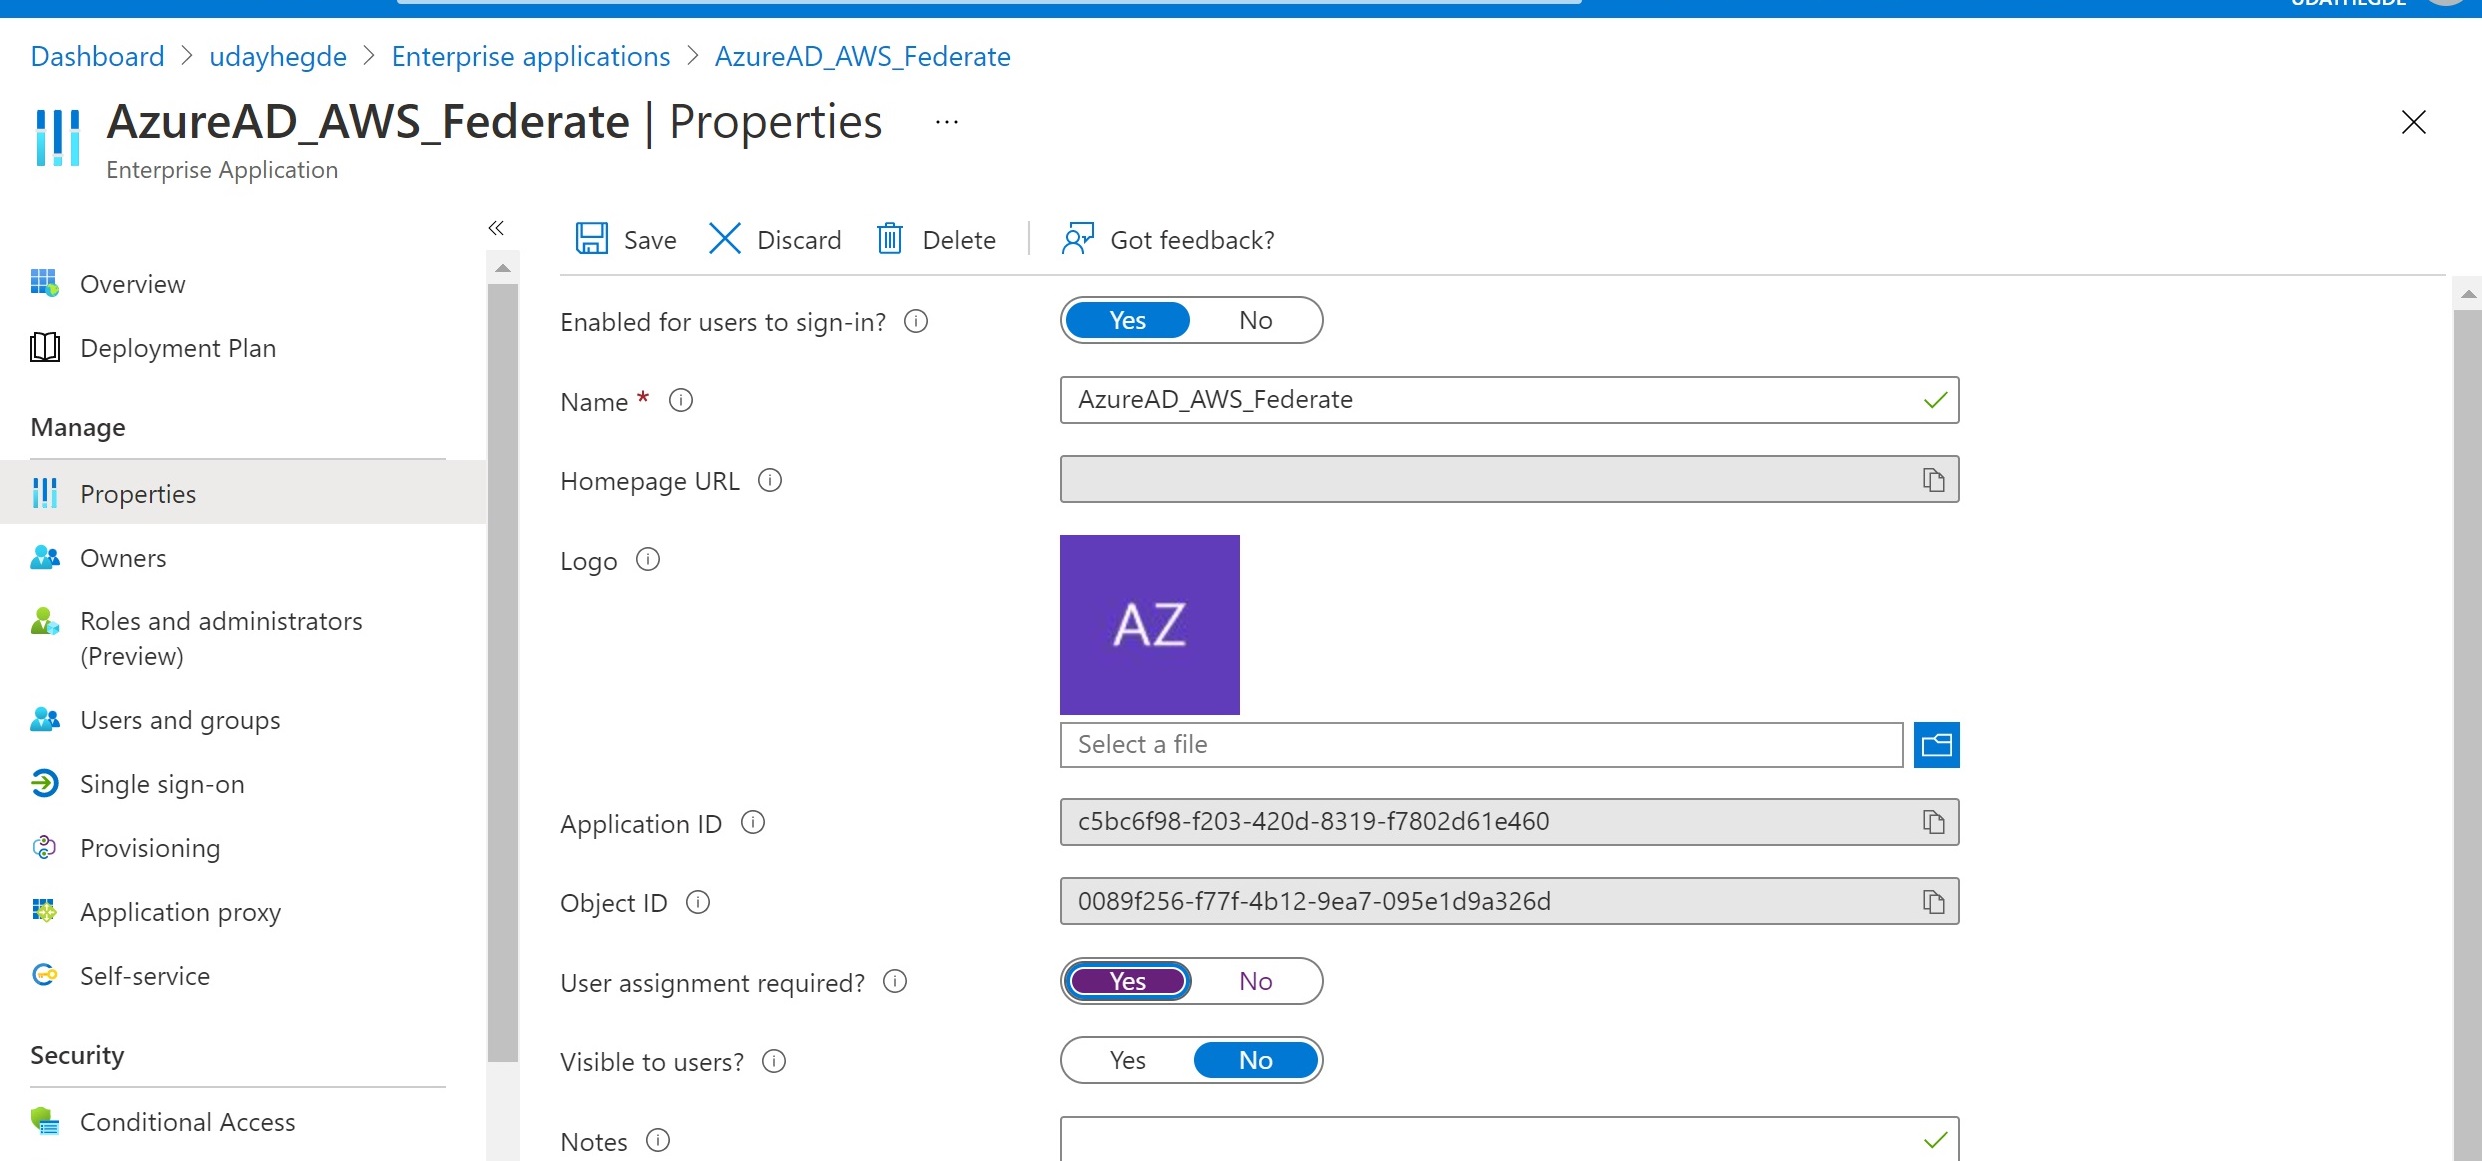
Here’s the configuration information if you choose to go this route. Go to your Azure AD portal, and visit Application Registrations, and create an application. Configure the Application ID URI.
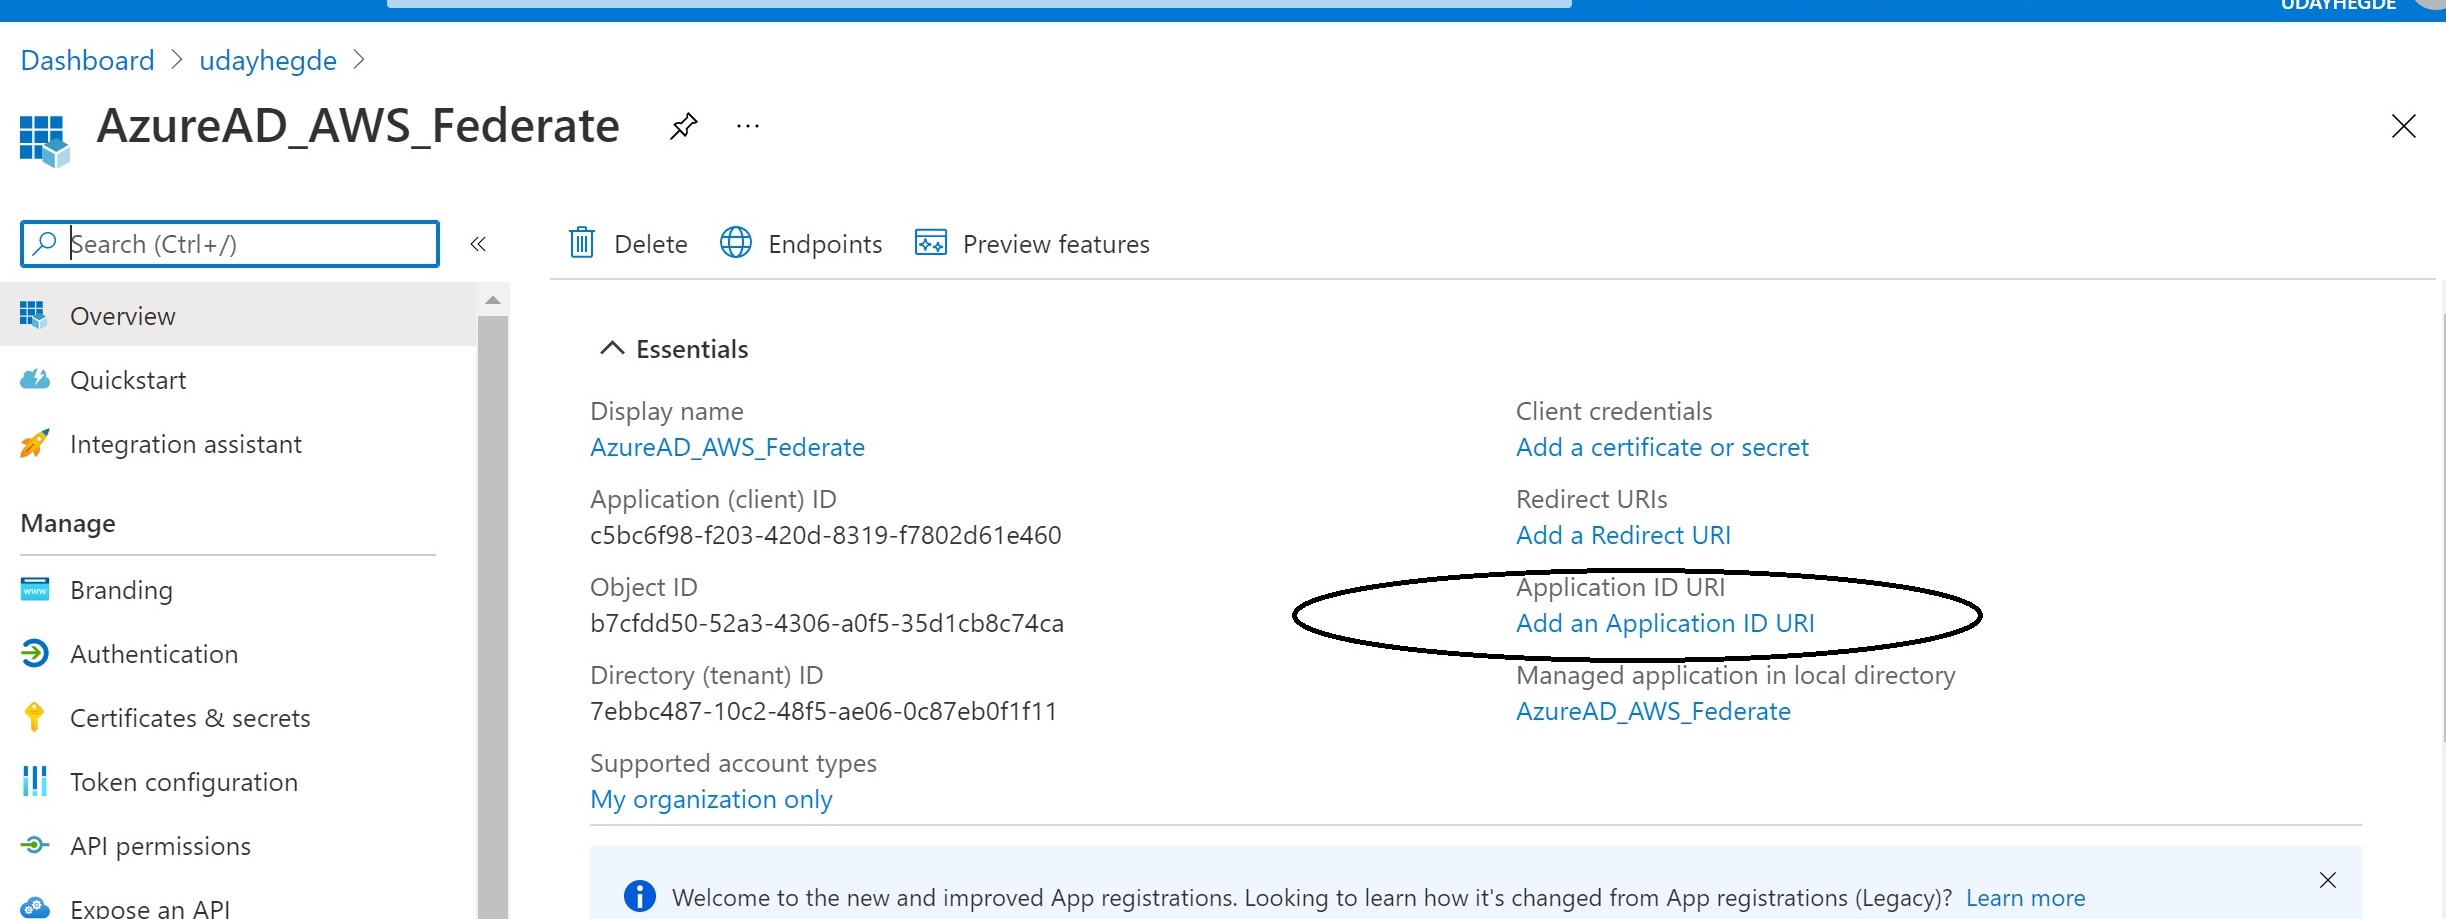
The URI can be any name you choose, and it will be the audience when you acquire a token for the app. For example: api://AWS_Application or URN://AzureAD_AWS_Federate
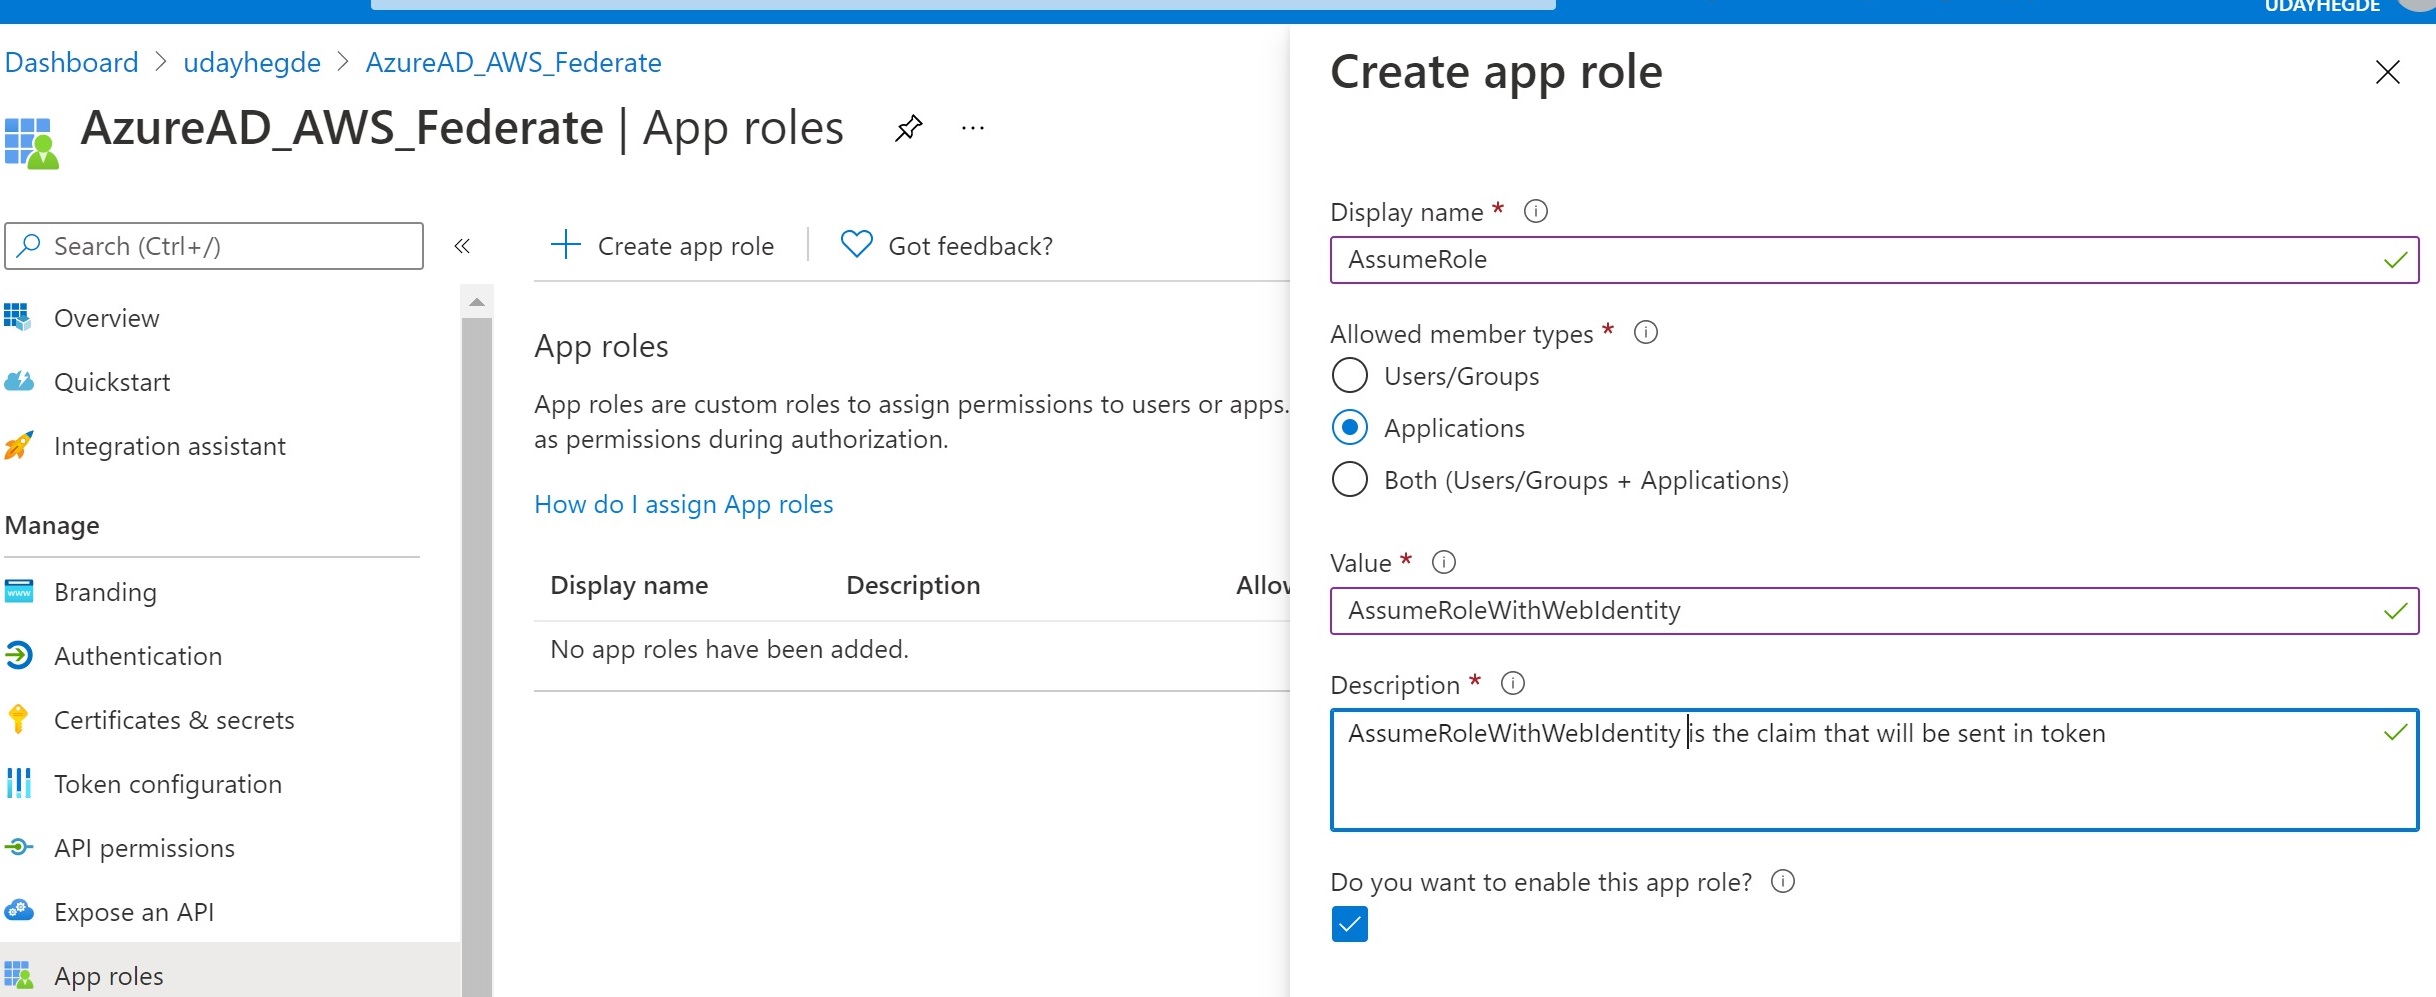
 Next, create an application role, and specify that only applications are the allowed member types. This part can be a bit confusing, since “applications” here is a misnomer. It should say “Service Principals”, which also includes managed identities.
Configure the application to require user assignment. Again this part can be confusing, since “user assignment” is a misnomer. You can assign any Azure AD identities, including service principals. This will ensure that only identities assigned to the application can get a token for the application audience.
Finally, we need to assign our managed identity to this role. Unfortunately, Azure AD does not provide this role assignment in the portal. You have to use a PowerShell cmdlet. This cmdlet is quite a handful with duplicate parameters which should have been unnecessary. This document shows how to assign a managed identity to an app role
For this step, you need 3 things: the object id of the managed identity, the identity of the app role you created, and the object id of the service principal that represents the application you created. You can find this last part by going to the Enterprise Applications on the Azure AD portal, and search for the application name you just created. The object you find is the service principal of the application, and you can look up the object id of that service principal.
You will be executing a PowerShell cmdlet that looks like this:
New-AzureADServiceAppRoleAssignment \
     -ObjectId <object id of your managed identity> \
     -Id <identity of the app role> \
     -PrincipalId <object id of managed identity again!> \
     -ResourceId <object id of the application service principal in your tenant>
Now configure the AWS role appropriately as follows: Set your app URI audience on your identity provider in AWS. On the AWS portal, go to the IAM service, and pick identity providers. Select the identity provider you added and pick “add audience” under Audiences. Add the app URI of your app as the audience.
Then pick roles on the IAM service portal, and select the role we configured called AzureADWebIdentity. In the “Trust Relationships”, edit trust relationship, and change the audience to the app uri of your application. Since we are allowing multiple managed identities to assume this role, we hae to remove the “sub” claim here. Your main control on who can assume this role is through the app role assignments.
{
  "Version": "2012-10-17",
  "Statement": [
    {
      "Effect": "Allow",
      "Principal": {
        "Federated": "arn:aws:iam::<your-aws-account-id>:oidc-provider/sts.windows.net/<your-tenant-id>"
      },
      "Action": "sts:AssumeRoleWithWebIdentity",
      "Condition": {
        "StringEquals": {
          "sts.windows.net/<your-tenant-id>:aud": "urn://AzureAD_AWS_Federate",
        }
      }
    }
  ]
}
Change your code to specify your app uri as the audience when acquiring an Azure AD token.
    const identity = require("@azure/identity");
    const audience="urn://AzureAD_AWS_Federate";

    const credential = new identity.DefaultAzureCredential(
                    { ManagedIdentityClientId : this.clientId });
    const token = credential.getToken(audience);
Hope this blog post makes it easy for you to configure access to AWS resources using Azure AD workload identities!
Comments/feedback/questions? DM me on twitter